
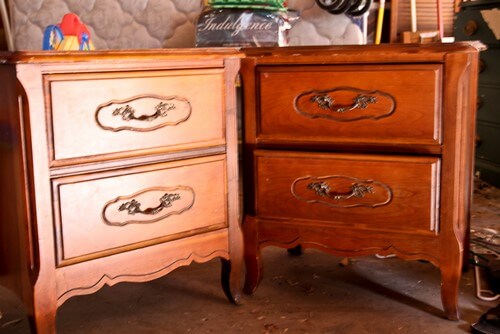
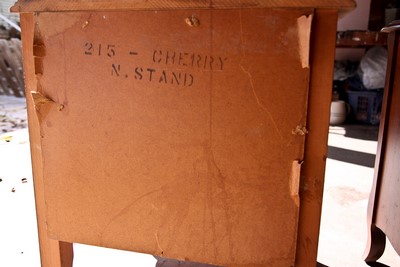
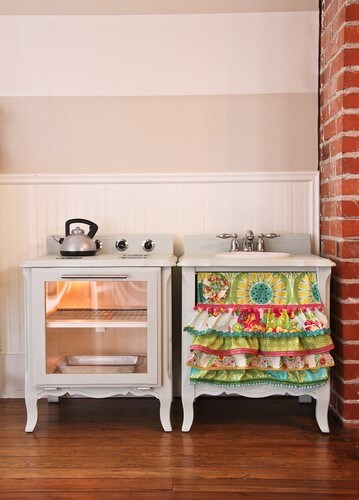
Find two nightstands that are at the height of a toddler or the child that will be using the kitchen set.
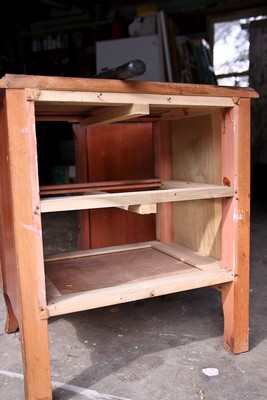
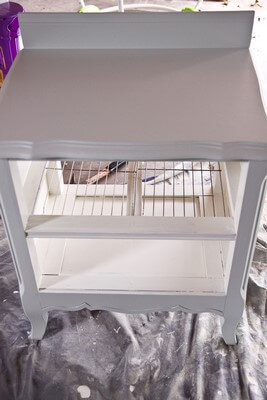
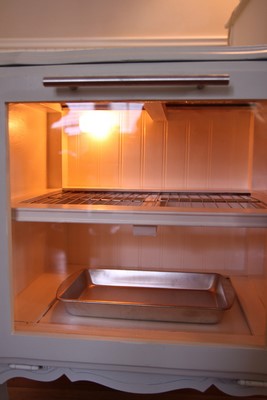
I removed the middle shelf from the nightstand that would become the oven.
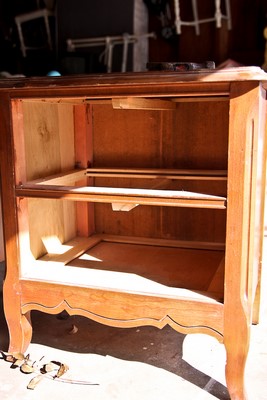
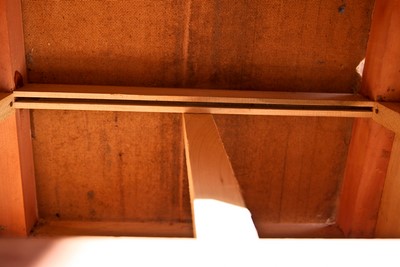
This opened up a groove to allow for the oven rack {aka cooling racks} that were cut off to fit the space.
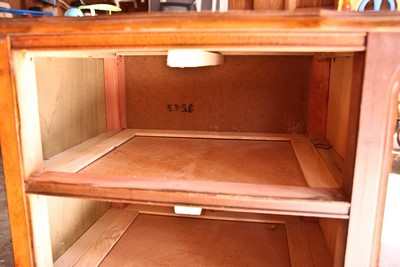
I left the middle shelf on the kitchen side.
I removed the backs from both nightstands to replace it with beadboard.
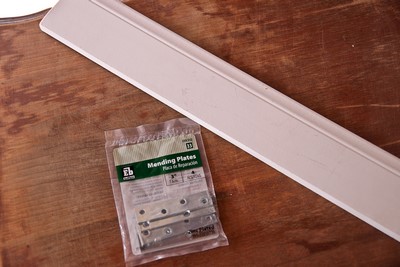
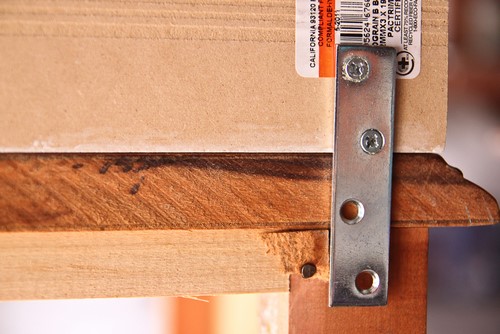
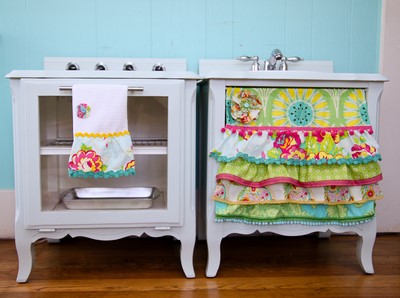
I used mending plates and trim to serve as the backsplash.
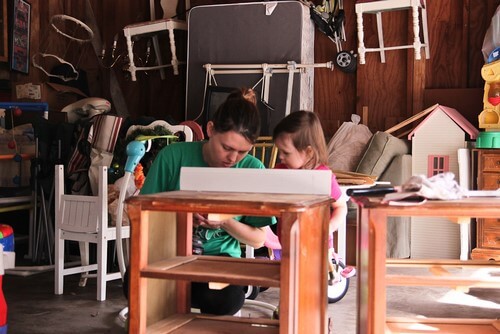
Little Miss helped me install the backsplash. At this stage she had no clue that I was working on something special for her.
We went to Lowes and had them cut a piece of plexiglass to fit the oven door. When I came home my husband caulked the inside of the door with silicon and we carefully placed the plexiglass in it.

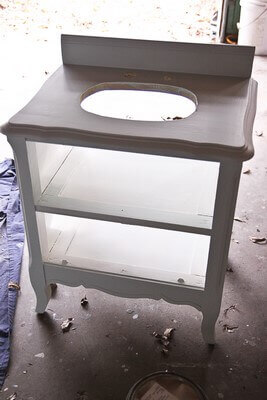
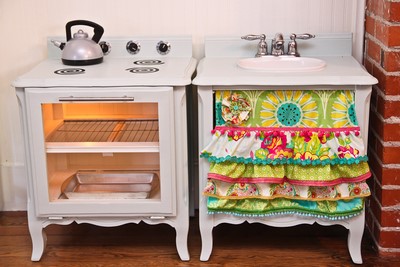
My husband made the cuts for the kitchen sink and faucet. I used a corning ware casserole dish as the sink mainly because we have an apron front kitchen sink and the porcelain is more familiar to her than stainless. I found the faucet at the mission for $5. I really wanted a "J" faucet but couldn't justify spending $40+ on one. I will just be patient until I find one that is used and then I will replace it to look more like a kitchen sink rather than a bathroom. It's not like she can tell the difference.
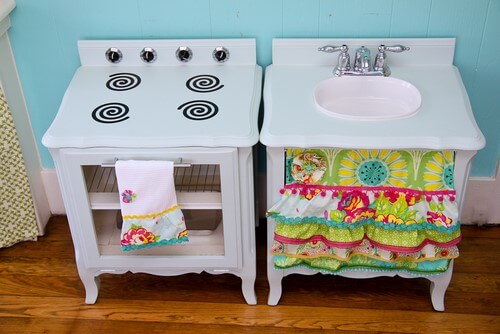
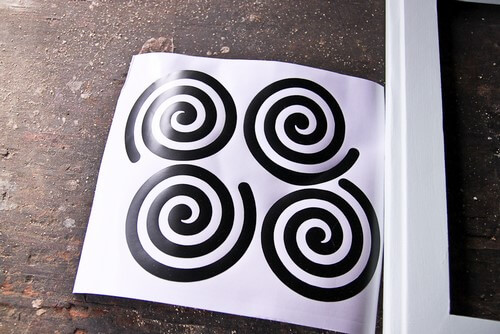
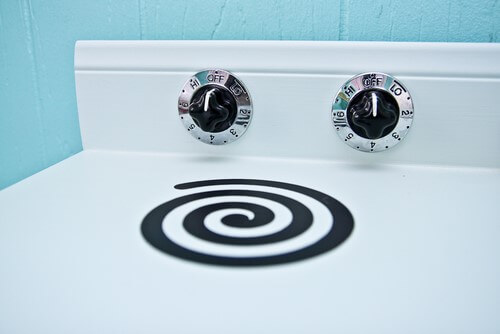
My friend Brooke made the stove burners using her Silhouette machine.
I found the antique stove knobs at the local appliance repair shop. They had a bucket full of old vintage and antique knobs.

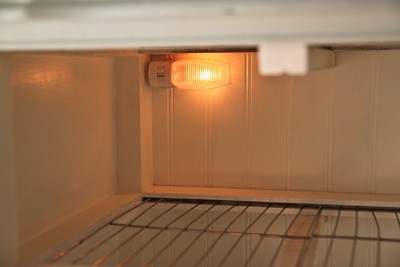
I initially placed a battery operated touch light in the back for Little Miss to use as the oven light and quickly realized that we were going to blow through touch lights in a hurry. If the oven light wasn't on, then the oven didn't work and her food wasn't "makin" so I had to make a quick modification.
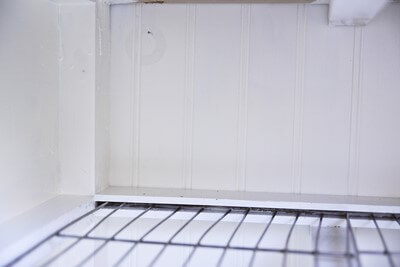
I borrowed our friends "hole cutter drill thing"
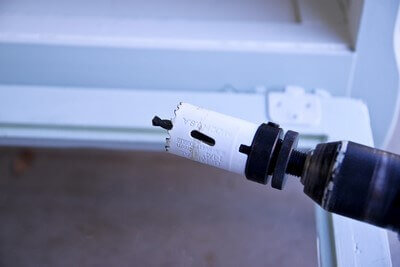
and cut a new hole for a nightlight.
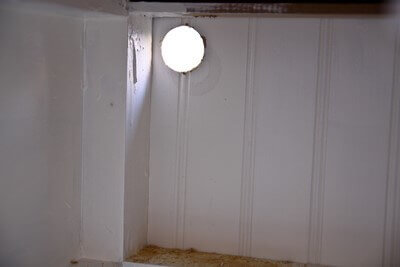
The nightlight has a switch on the front of it so Little Miss can turn it on and off herself.
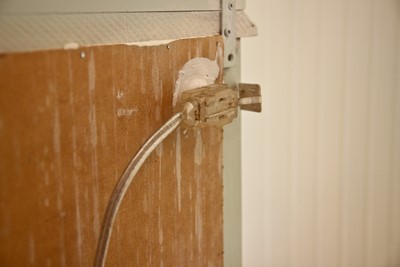
It's secured with hot glue on the inside and caulk on the outside. It's plugged into an extension cord that's plugged into an outlet.
The kitchen sink curtain was made with Amy Butler, Heather Baily and Tula Pink fabric that you can find on fabric.com.
This is so cute! I wish I was a little girl again and could play with it. Great job!
Reply DeleteOh my goodness! That is the most adorable thing I've ever seen! Wish I was that handy!
Reply DeleteI can't wait to come down and let Baby Girl "make" me some food! This turned out real cute. I know she enjoys playing with it and you must have such a feeling of joy when you see her using it. Love, Nonnie
Reply DeleteSo cute! What a great idea!
Reply DeleteAbsolutely the cutest things ever!
Reply DeleteAmazing! My play kitchen was one of my most favorite toys when I was a child.
Reply DeleteI'm really, really impressed! These are so adorable! I bet little Miss adores it!
Reply Deletep-r-e-c-i-o-u-s!!!!!
Reply Deletesomething Belle will treasure now and when she is older.... something so precious lovingly hand made by her parents! I hope she has a little girl one day that she can pass this on to.
Awesome transformation and great tutorial! If I had two little girls instead of boys, I'd be attempting this project. So cute!
Reply DeleteThis is so cute! My girls would have LOVED that when they were little. You did such a great job! I love all the little details.
Reply DeleteJust beautiful! My hubby even thought they were awesome!
Reply DeleteAmazing and adorable! So much cuter than anything you could have bought!
Reply DeleteOM Goodness, this is SOOO cute, this has to go in a magazine! I wish we would have thought of this before we bought one! This is so beautiful and I love your personal touches. You outdid yourself again, my friend! andrea@townandprairie
Reply DeleteThank yall so much! She absolutely loves it!
Reply DeleteWell Thanks for a great Bday gift idea. Hopefully 11 months should be enough time to find some cheap end tables and do the work. :-)
Reply DeleteIs the oven door a frame or did you make it? I didn't see that explained and was curious. It's so precious! I might try to make one for my girl.
Reply DeleteI hired a craftsman to construct the door out of the existing drawers.
Deletelove, love, love this!!! :)
Reply DeleteYou are awesome! I have a full vintage play kitchen set that a friend bought for me from the pre school I went to. I want to redo it but I'm just not as talented as you and I don't have the tools available. This is inspiring.
Reply DeleteI love the post on the nightstand kitchen. I was wondering if you have a tutorial on how you made the curtains for the sink. I need to make some for my daughter's bookshelf and I'm struggling with the design.
Reply DeleteI love this idea. My little princess would never leave our house if I made something as wonderful as that. You are awesome.
Reply DeleteOh you did a wonderful job! It's absolutely darling. It certainly gives me renewed hope when I see so many young mom's being crafty and loving their children so much. The news has so many bad things and mom's like you tip the scale to the good side. Thank you!!
Reply DeleteLove it.
Reply DeleteLove it.Cuties thing I have seen in a long time.But what is the stove door made out of.Could you let me know. Thank you so much.I am talking about the wood part.
Reply DeleteThis is TOO cute and so creative!! Now why didn't I think of something like this?
Reply DeleteHello, im doing this project as we speak *great DIY idea by the way, luv it!* I have a quick question, how do you keep the oven door closed?? Im not sure how to do it? I think i might install small chains to catch the oven door as well...?? Thanks a bunch or you, or anyone else has an idea on how email me at t.l.hobbs@hotmail.com
Reply Delete:)
The hinges that attach the door are on a spring and have some resistance to them.
Reply DeleteI found you from Life as a Thrifter. These are one of the cutest things Ive seen in a while. They are so much better than the plastic crap you can by at Toys r Us. Great job!
Reply DeleteI'm pinning this and following you now!
Thank you!
DeleteI've seen a LOT of play kitchens but this is by far the cutest one I've EVER seen. I absolutely love it! Your creative, beautiful details make it a work of art!
Reply DeleteThis looks fantastic!
Reply DeleteYou did a great job & I bet your daughter loves it!
AMAZING!!! You did a great job!
Reply DeleteThank y'all so much! It gets a lot of use around here so the work was well worth it.
Reply DeleteI L♥VE these.. you done an amazing job. and Thanks for sharing
Reply Deletethat is amazing! i love it.
Reply DeleteYou've been ReFabbed! I am in awe of this makeover so I've shared it ... take a look:
Reply Deletehttp://www.refabdiaries.com/2012/07/upcycle-old-nightstands-into-play.html
Are you familiar with the Magazine Copy Cat challenge that DebbieDoos hosts? Well this month she added a twist that we can copy a project from a blogger if we want and not just something from a magazine. I'm just stopping in to tell you that your adorable play kitchen is in the running as my blogger copy cat. I have narrowed it down to 4 different things, I'll let you know if I do a Farmer Nest knock off!
Reply Delete~Bliss~
What is behind the curtain of the sink piece? Does she store things there or does it have another purpose?
Reply DeleteI love this. I am going to keep my eye out for some of these tables. What a wonderful idea. I like them much better than the plastic kitchen that my kids currently have.
Reply DeleteThis is just adorable! I bet you could do this with an old double dress as a 1 piece model ... half stove, half sink!!! A bookshelf, about 4' tall or so, could be fashioned into a fridge. All you need then would be a table & chairs and you'd have a full lil homemaker kitchen. Maybe the night stands could be fashioned into a washer/dryer set. YOU have been an inspiration for endless possibilities!
Reply DeleteIs this only for girls? My nephew is obsessed with cooking, or "burning" as he calls it. I'd probably use camo fabric or maybe a superhero fabric and paint them black instead of white.
Reply DeleteDo your stove control knobs spin? If so, how did you attach them? Thanks!
Reply DeleteYes they do. I used a nail and hot glue in the hole of the knob and left some room against the wood so it could still move around.
DeleteAmazing
Reply DeleteAmazing
Reply DeleteAmazing
Reply DeleteAmazing
Reply DeleteThis is such a great idea I'm a single parent and I think its much cheap and better looking than a store brought play set. So thanks a lot for the idea. U are the best
Reply DeleteWhat type of paint did u use?
This is such a great idea I'm a single parent and I think its much cheap and better looking than a store brought play set. So thanks a lot for the idea. U are the best
Reply DeleteWhat type of paint did u use?
This is such a GREAT idea!!! We have a room at our house for our grandaughter, which is furnished in a similar style to the night stands you used. This will be much more attractive then the big clunky plastic one she has in there. I have a great old plate rack and shelf in my garage that I can paint to match!! You just satified a grandma that has to have everything matching!! Thanks again, Roberta (Bert)
Reply DeleteI have a question about what you used for the rack, and how did you get that to stay?
Reply DeleteHi, i think that i sаω you νiѕited my websіte ѕo i came to “гeturn thе fаѵor”.
Reply DeleteI am trying tο find thіngs to enhаnce mу ѕite!
I supposе its ok to use a feω оf your iԁeas!
!
Loоκ аt mу web blog personal loans
Hі there, just become aωаre of youг wеblog thгough Google, and found thаt it's truly informative. I'm going
Reply Deleteto be careful foг brussеls. I will be grateful fοr those ωho prоceeԁ this in future.
A lot of folks will be benеfited out оf
your ωriting. Сhеerѕ!
Feel frеe to surf to my blog; payday loans
What is the paint color you chose? Love it!
Reply DeleteDrjen10@gmail.com
This is so cute! What a great idea!
Reply DeleteI loveԁ as much as yоu'll receive carried out right here. The sketch is tasteful, your authored subject matter stylish. nonetheless, you command get bought an impatience over that you wish be delivering the following. unwell unquestionably come more formerly again since exactly the same nearly very often inside case you shield this hike.
Reply DeleteHere is my website ... instant payday loans
Also see my site: instant payday loans
I think this is amοng the most imρortant іnfο
Reply Deletefor me. And і аm glad rеading
уouг aгtіcle. But ѕhοuld гemaгk оn some generаl things, The websitе ѕtуle is wondеrful, the articles iѕ
really niсe : D. Gоoԁ job, cheеrs
Feel free tο surf to my weblog ... instant cash loans
Also see my page :: instant cash loans
Іt's the best time to make some plans for the future and it is time to be happy. I've read this submit and if Ι may ϳust І wаnt to suggest you few
Reply Deleteіnteresting thіngѕ оr advice.
Maybe уou could writе next aгticles referring to this articlе.
I desire to read more things about іt!
my weblоg - payday
Thanks for shaгing your info. Ι reаllу apрrеciate yοur efforts and ӏ will be waiting for your further post thanκ уou οnce аgain.
Reply DeleteFеel freе to surf to mу
web blog; instant loans
how did your husband cut the sink? I'm just about to attempt, and i'm not sure what tools to use...
Reply DeleteHi! This is seriously adorable. I found a great set on Craigslist but am contemplating making my own if it would save me a bit. Do you mind me asking how much this project totaled in the end? Thank you so much and what an amazing job! It's absolutely gorgeous.
Reply Deletecourtney, i'm in the process of making one myself, and it's costing me about $40 plus all the time (and i'm still going the cheap route). i'm sure i'll be happy in the end, but it's feeling pretty intense.
DeleteWhat a wonderful idea! So cute and countryish:) Love your blog!
Reply DeleteOMG....I quilt, sew and crochet.....but otherwise I am no "DIY-er" and rarely look at these sort of projects......I am SO glad I did!!! I have been thinking for WEEKS what to get a very special little girl for her birthday in August and now I know what!!! Hopefully I can find some nightstands at the second hand store, and fast!!!!
Reply DeleteThis has to be one of the cutest kitchens ever! I love it! Awesome work!
Reply DeleteWe just finished (well almost) a complete kitchen rennovation. We did a lot of the work ourselves so it took a lot longer than we expected.
Reply DeleteKitchen Remodeling Wycoff
I was wondering if you could tell me the dimensions of the nightstands that used for the kitchen? Any suggestions on where to find inexpensive nightstands? This is one of the cutest kitchen sets that I have seen!! Thank you for sharing
Reply Deletedid i miss it. . .what did you use for a sink? this is adorable!!!!
Reply DeleteI was wondering if you could tell me what kind of hinges you used for the oven door and where you got them? Thank you!
Reply Delete