* I'm not crafting yet, I did this before Baby E's arrival.
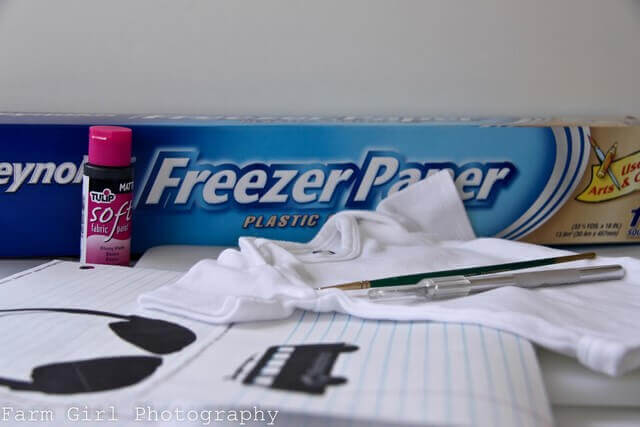
Supplies:
Freezer paper
Fabric Paint
Blade pen
Iron
Paint brush
Onesie
Step 1
Print off your image in the size that's fitting to the onesie or shirt you are using.


Step 2
Lay a piece of freezer paper over the image dull side up and shiny side down. The shiny side is what will adhere to the clothing so make sure you have the image in the right position.

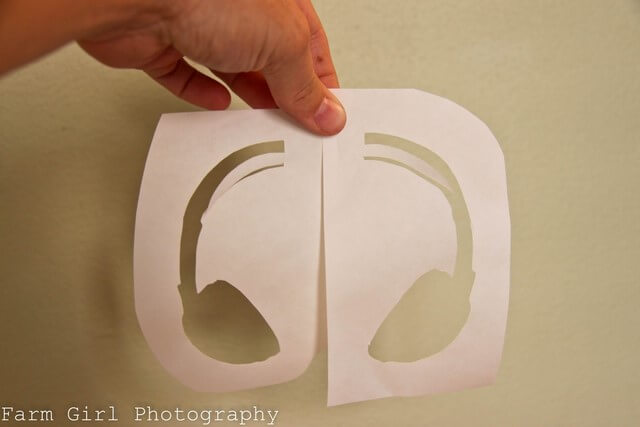
Step 3
Using a razor blade trace the image cutting out the parts you will want the paint to show up on. If there are areas that are white in your image then you will want to leave the freezer paper in tact so the paint won't get on it, thus allowing the white shirt to show through.
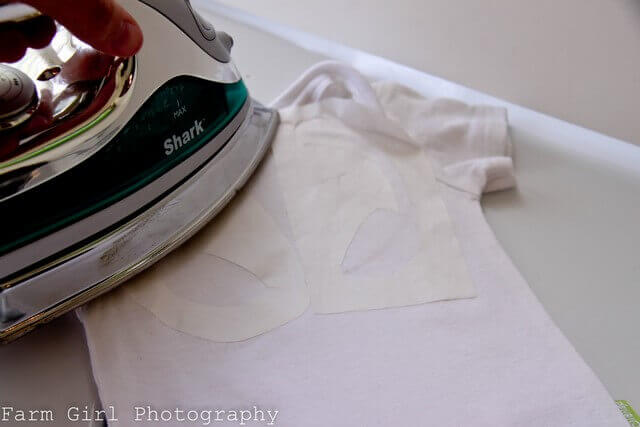
Step 4
Place shiny side down onto the onesie and iron in place. Make sure you iron all the details down well so it seals it from the fabric.
Step 5
Using a small paint brush, paint onto the fabric. Allow to dry and paint 2 or 3 more coats. Make sure you have enough layers on it to endure the life of a favorite onesie. Or you could do 1 layer if you want it to quickly fade and have a vintage look.
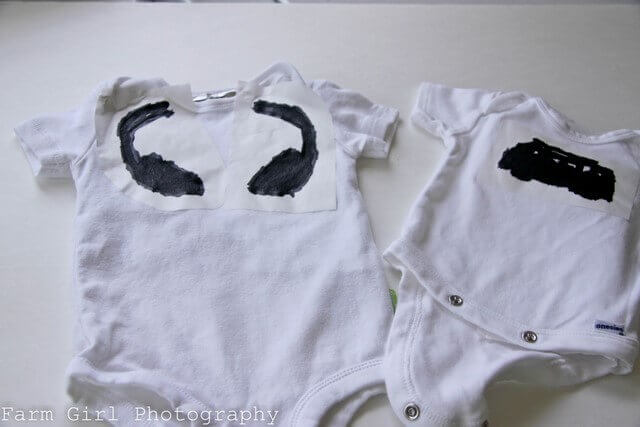
Step 6
Allow to dry for at least 48 hours. Once it is completely dry slowly peel away the freezer paper and reveal your image.
Step 7
Put it on an adorable baby.

*This project would also work well on pillows, bags, towels....and pretty much anything you want to customize, so it's not limited to baby gear.
*I also think you might be able to adhere the freezer paper to a cricut and let it do the hard part for you. I'm not an owner of a cricut so I can't speak from experience but it's a thought.
I just saw this done on placemats the other day - so cute!
Reply Deletewhoa i love these!!!
Reply DeleteSo adorable!!!! He is so sweet :)
Reply DeleteOh!!! It looks great! And he's just precious!
Reply DeleteRobyn Blog Lovers, I think we should all pitch in an purchase a Cricut for her pronto. Right?
Reply Deletegrandbaby on the way, and I will surely do some of these! I love the bus graphic by the way!
Reply DeleteI am just about to make some of these for a baby shower on Saturday! I am very glad to find out about the 48 dry time! Thanks a lot, and you bet, that is an adorable baby!
Reply Deletesuch a great project. Thank You. I have to add you to my list of favorite blogs. Love your blog.
Reply DeleteThis is a great project. Thank you. I have to add you to my favorite blog list ,love your posts.
Reply DeleteI love making original tshirts... hate iron on letters from craft stores. thanks sooo much!
Reply DeleteDoes the paint bleed through to the back of the onsie? I will place a piece of thin cardboard inside the garment to keep the paint on the front only.
Reply DeleteIt can bleed through depending on the fabric you use that's why I recommend putting a piece of cardboard in between the two pieces of fabric.
Delete