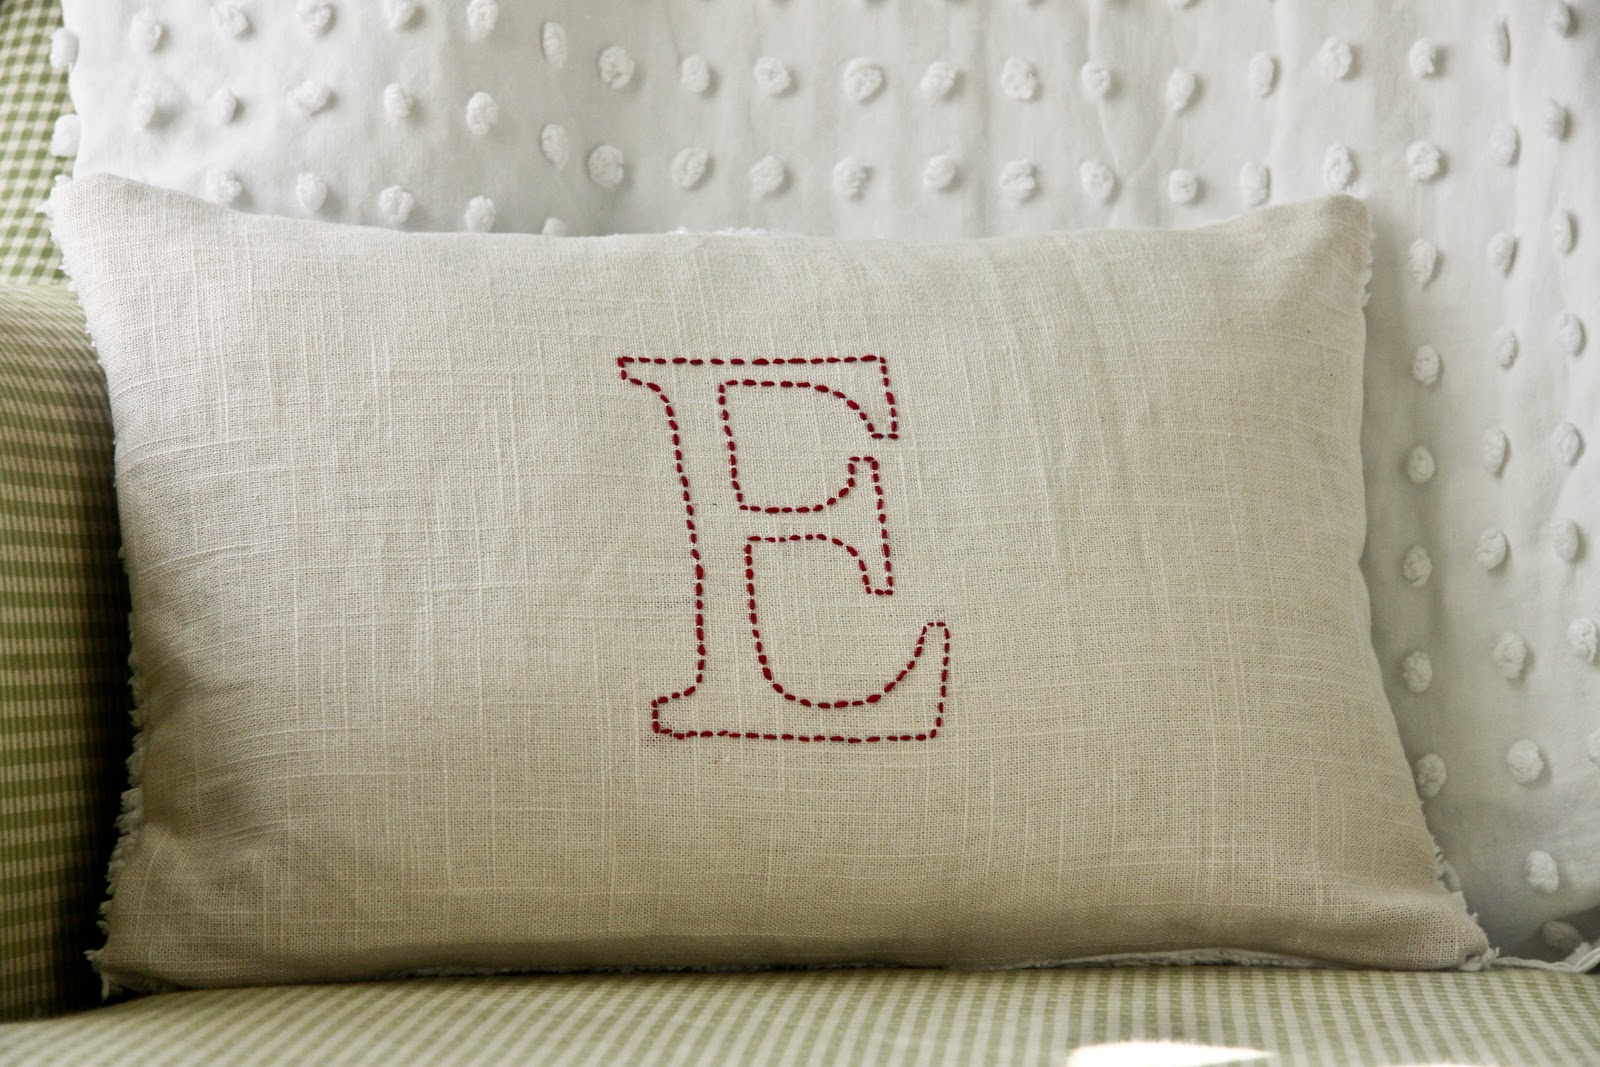
I have already met my budget for the nursery so I knew I was going to have to get creative.....insert homemade monogramming/embroidery.
When I first started this I was just hoping it would turn out looking decent, once it was finished and in the room I loved the way it looked sitting on my glider...so much so that I want to make some for our bedroom.
This is a super easy project with no sewing skills required. Sometimes I think people see a needle and yarn and think they can't do it. I promise, if you can follow a straight line and stick a needle in and out then you've got this.
Supplies:
Cotton Embroidery Floss
Erasable sewing pen
Letter template ( I used one previously cut from a cricut but you could easily print and cut on regular paper.)
Pillow or fabric you plan to use to make a pillow.
Medium size sewing needle
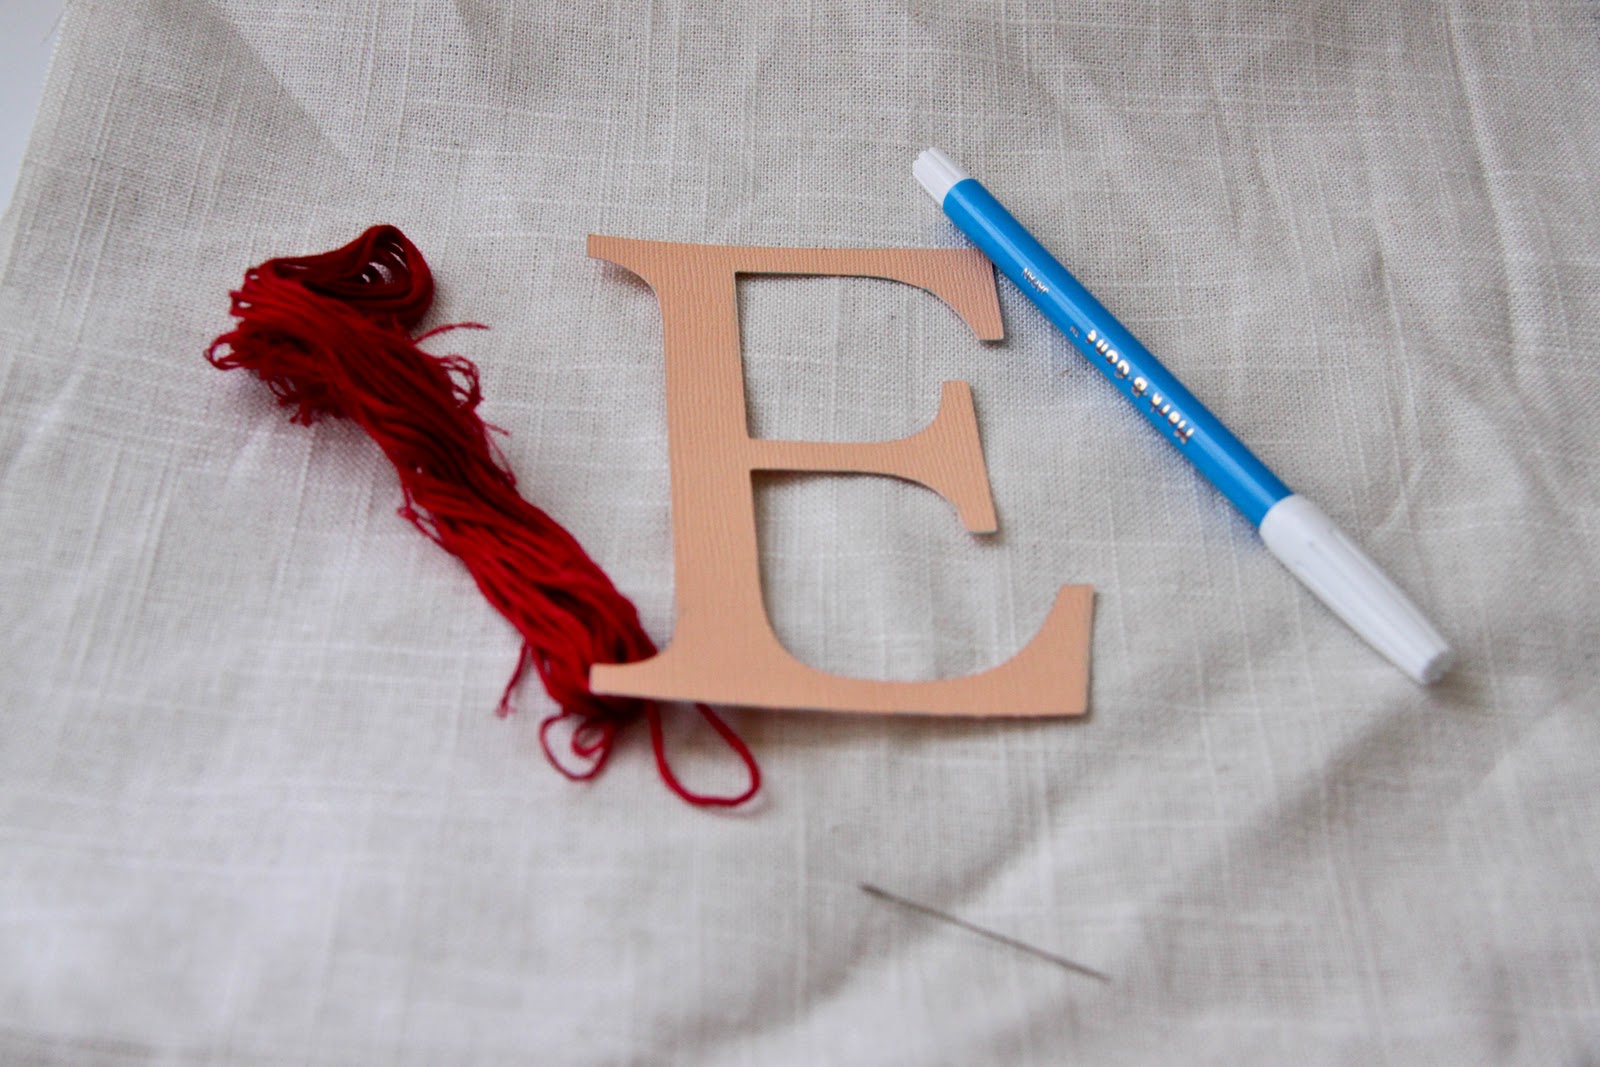
Step 1
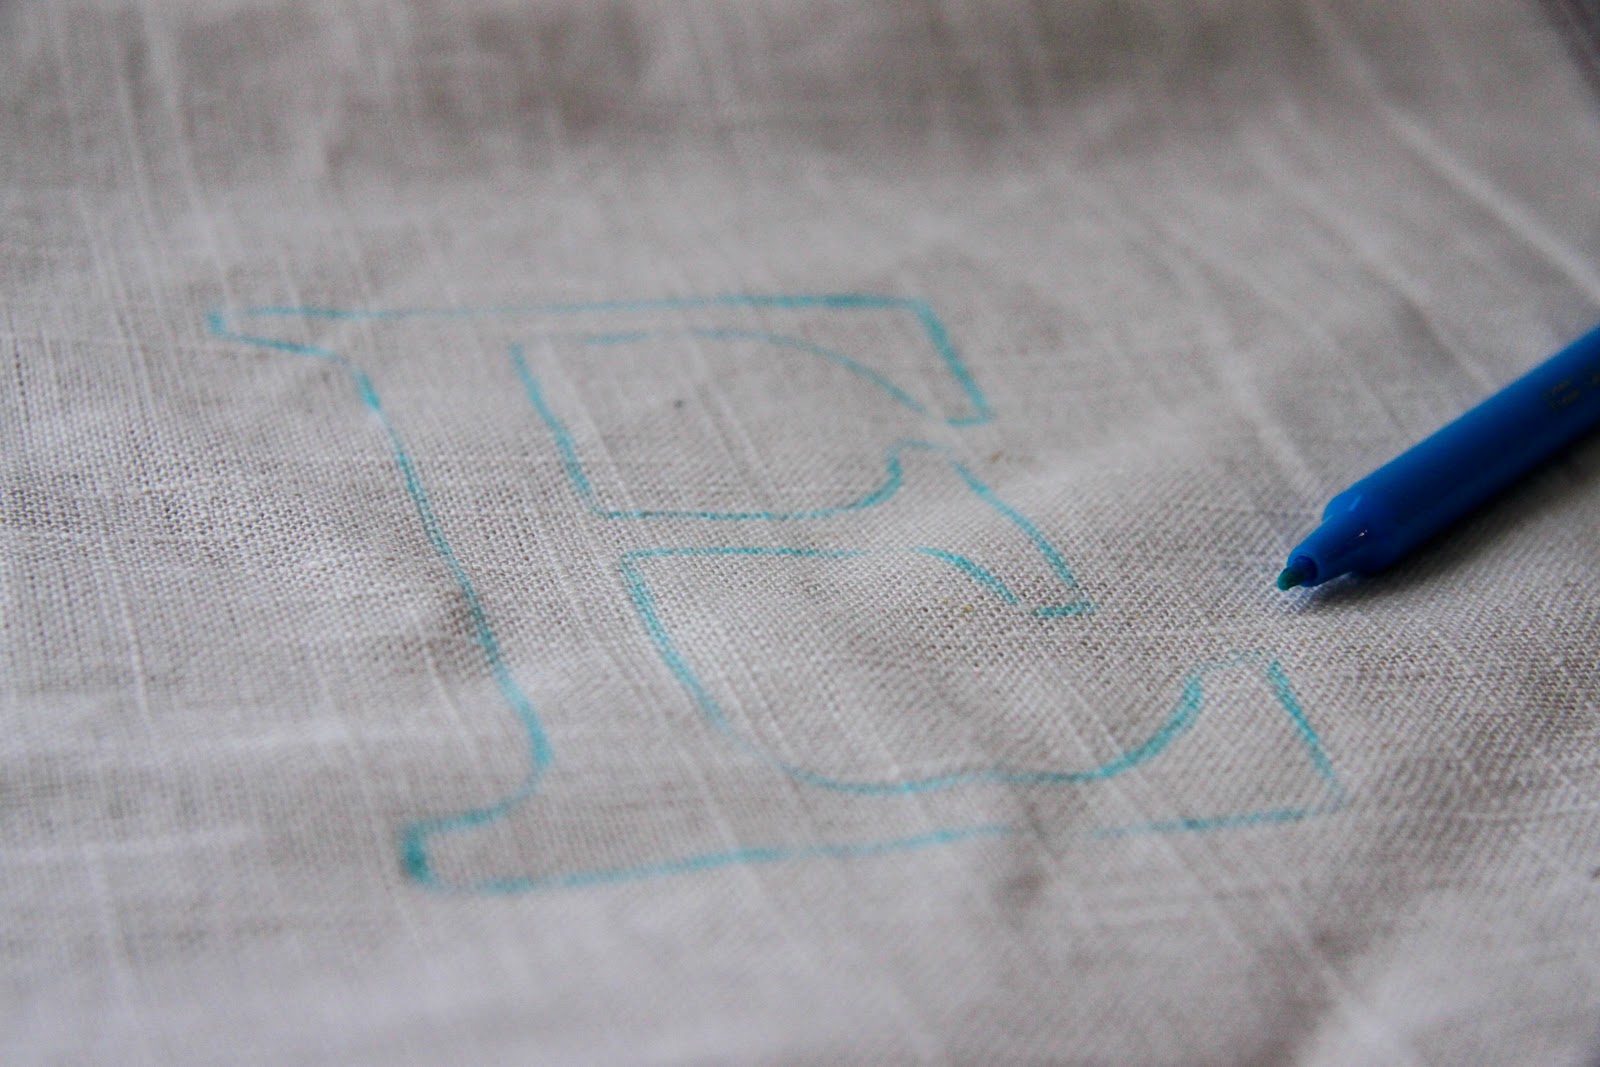
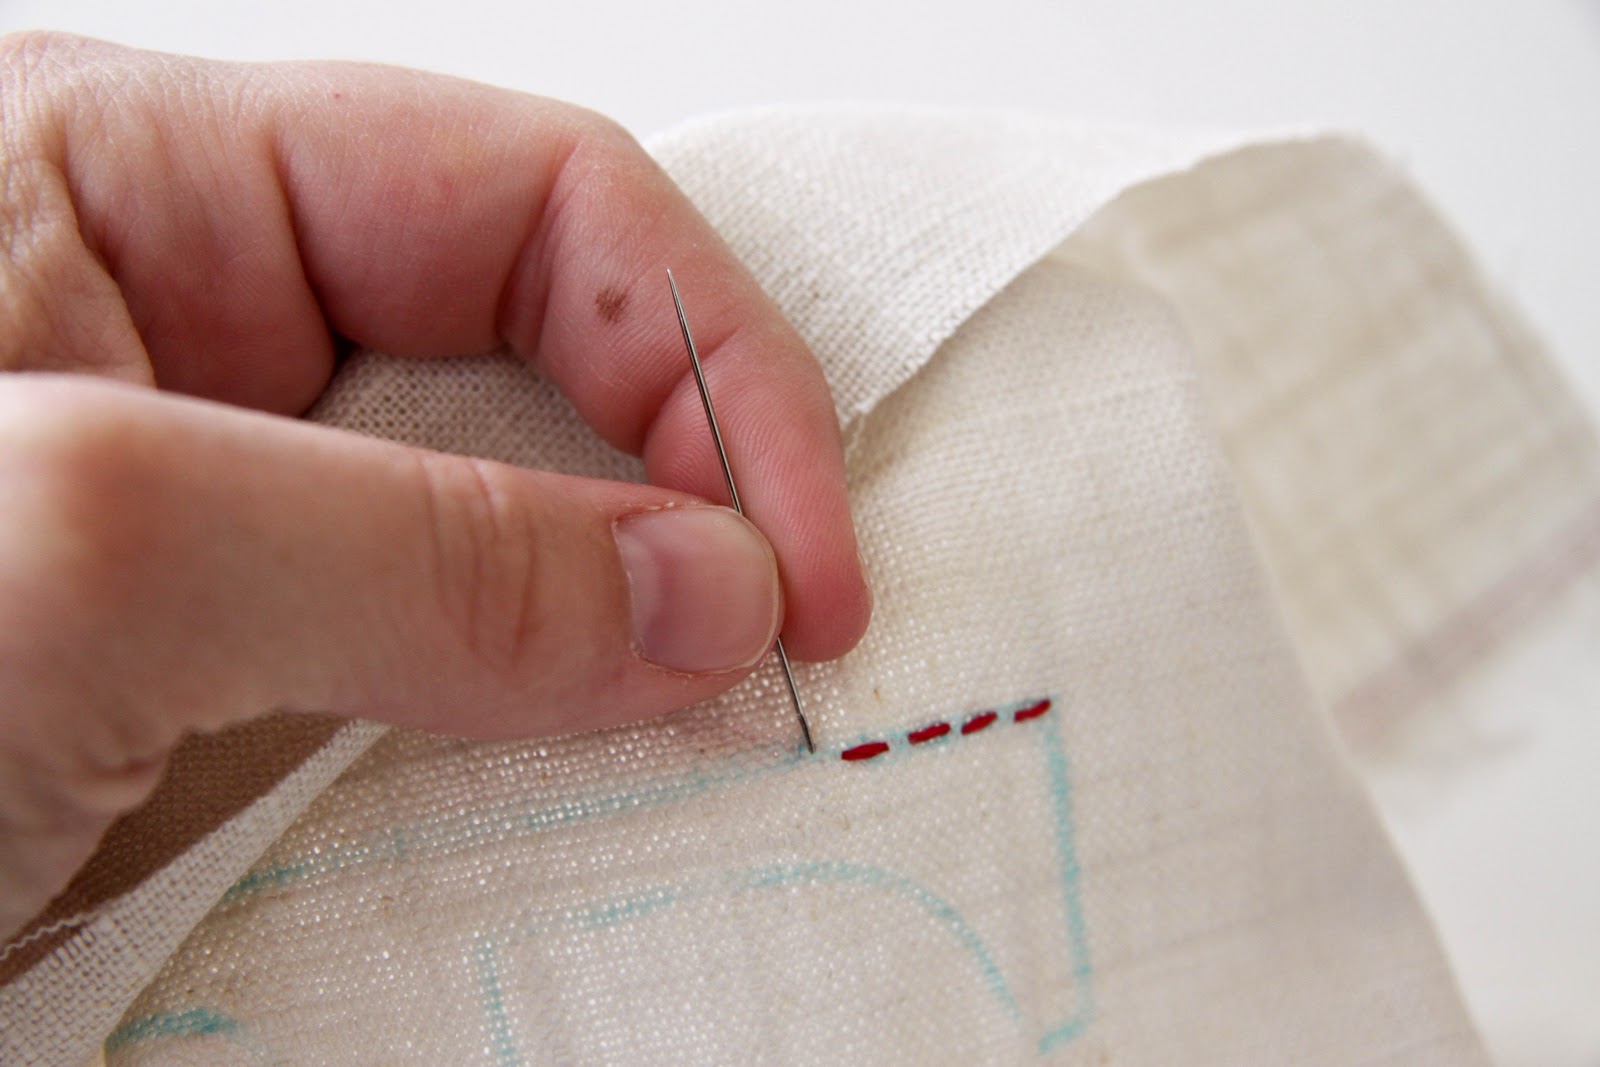
Center the letter on your pillow and trace it with the erasable pen.
Step 2
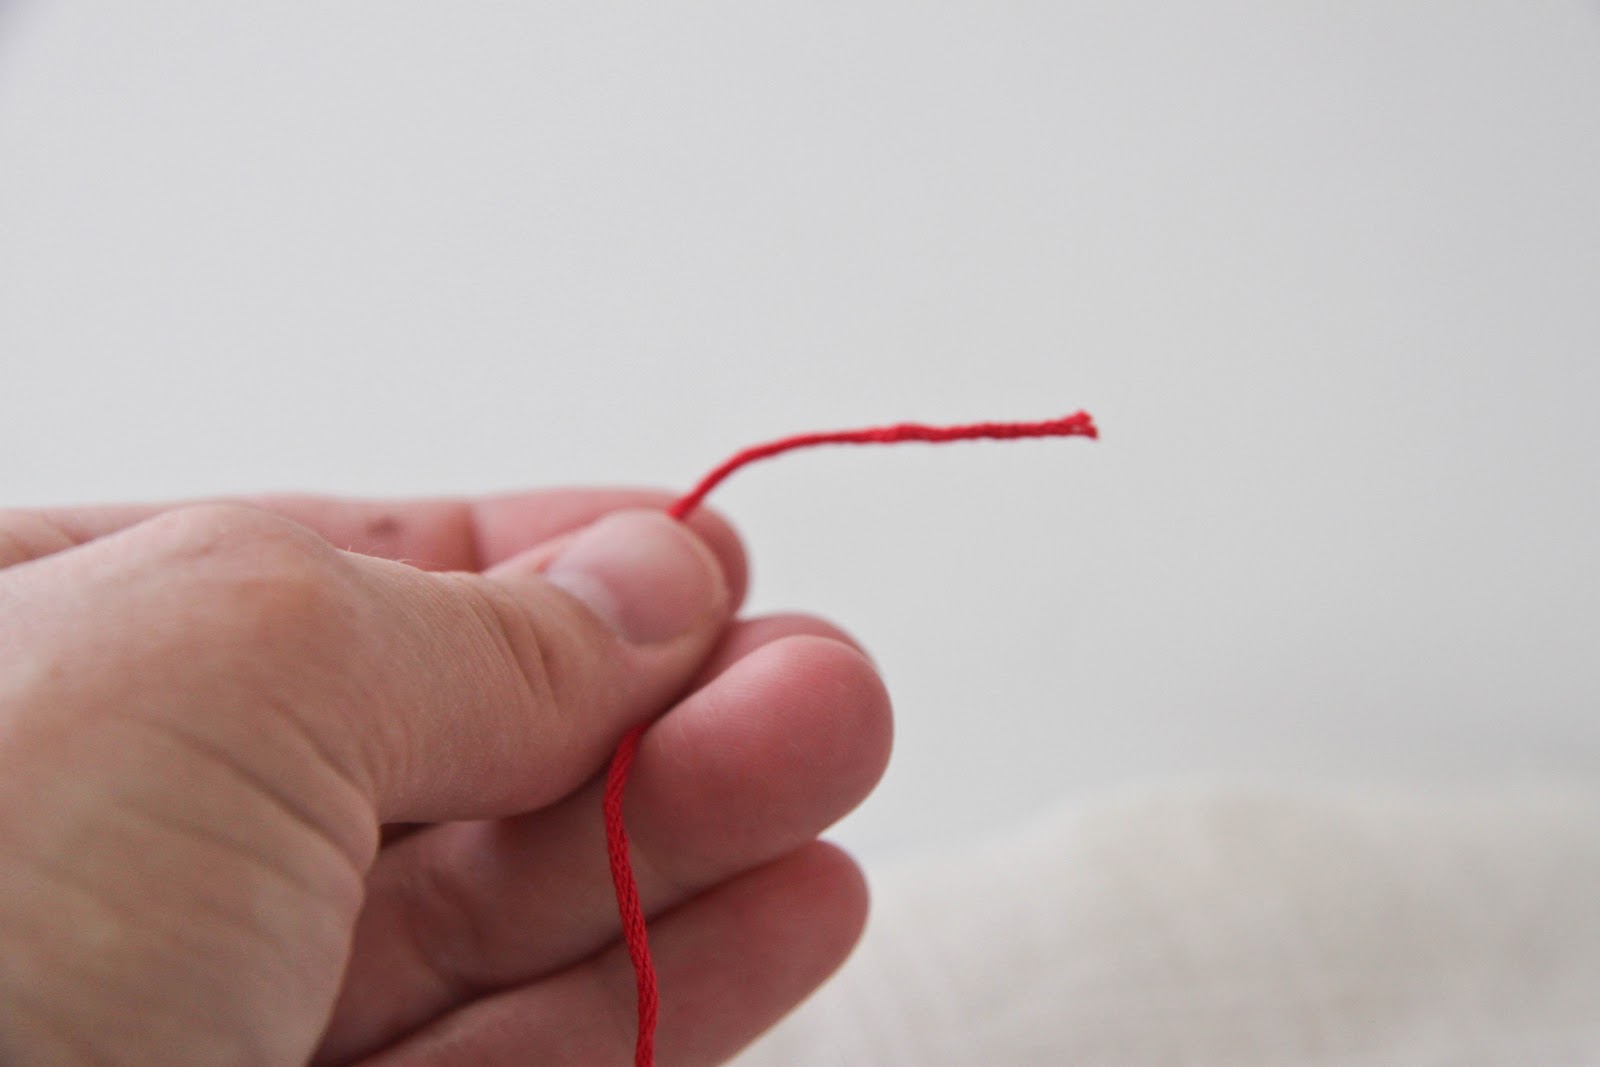
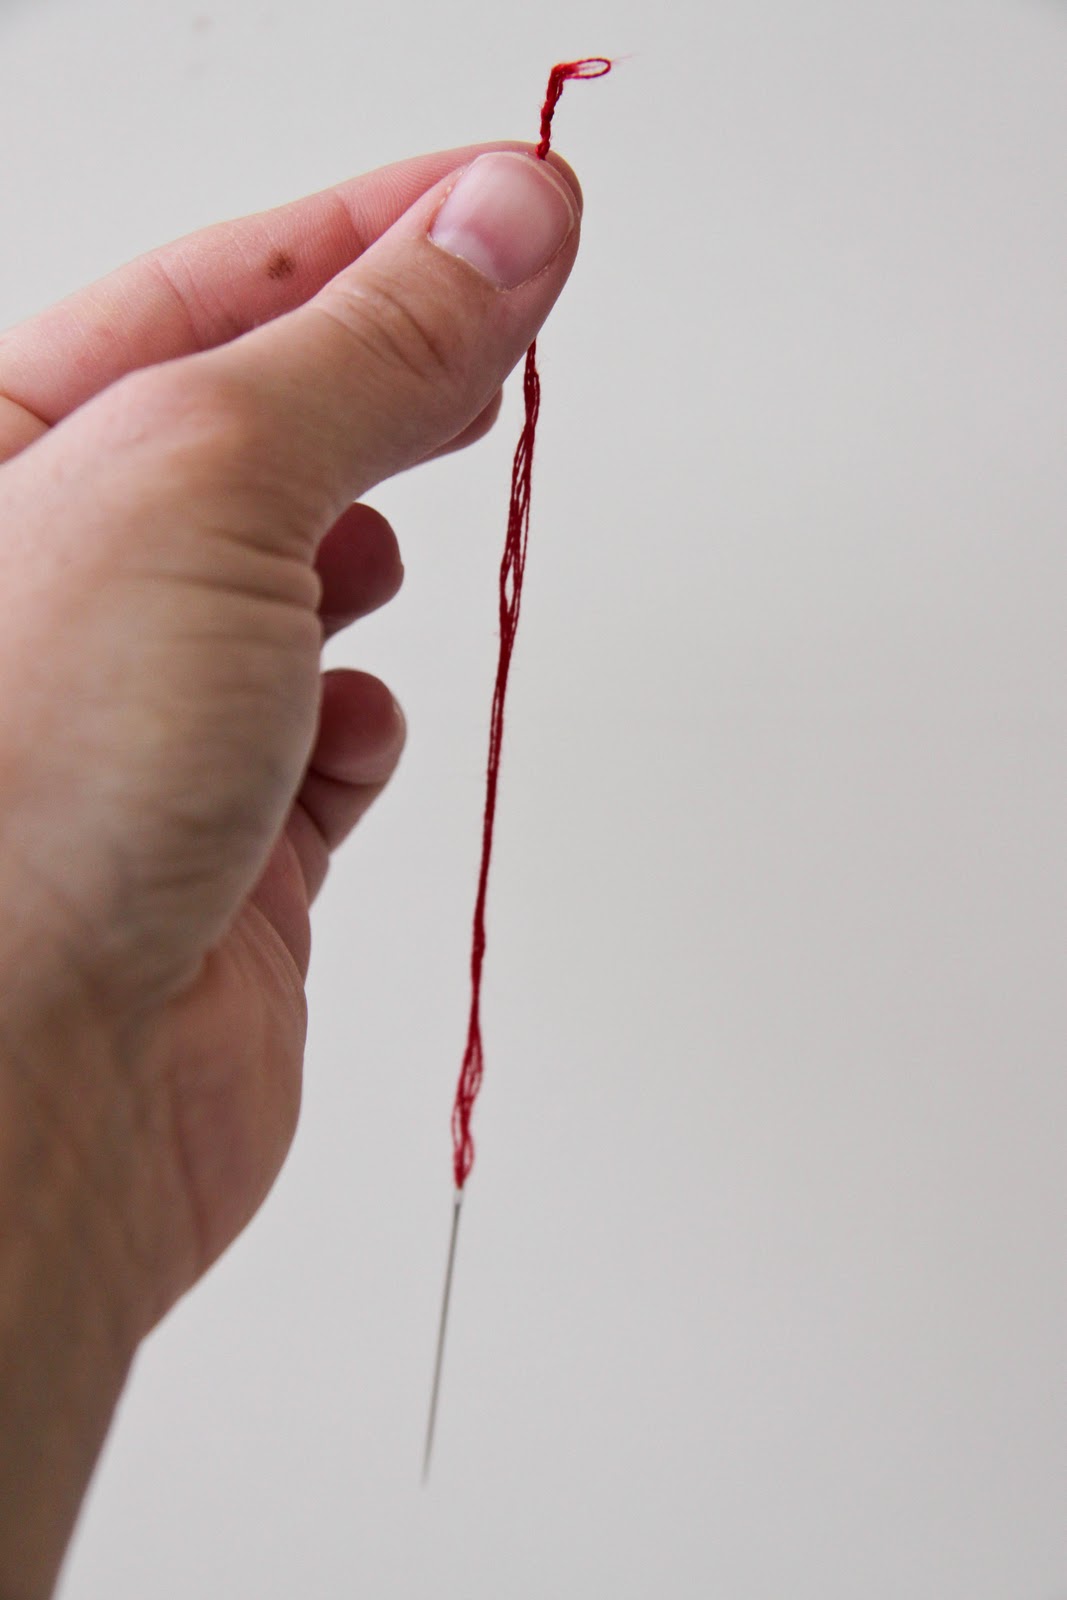
Cut a piece of the floss about 1 ft to start off with. Because you will loop this through the needle it will end being about 6 inches. You don't want your floss to be too long.
Step 3
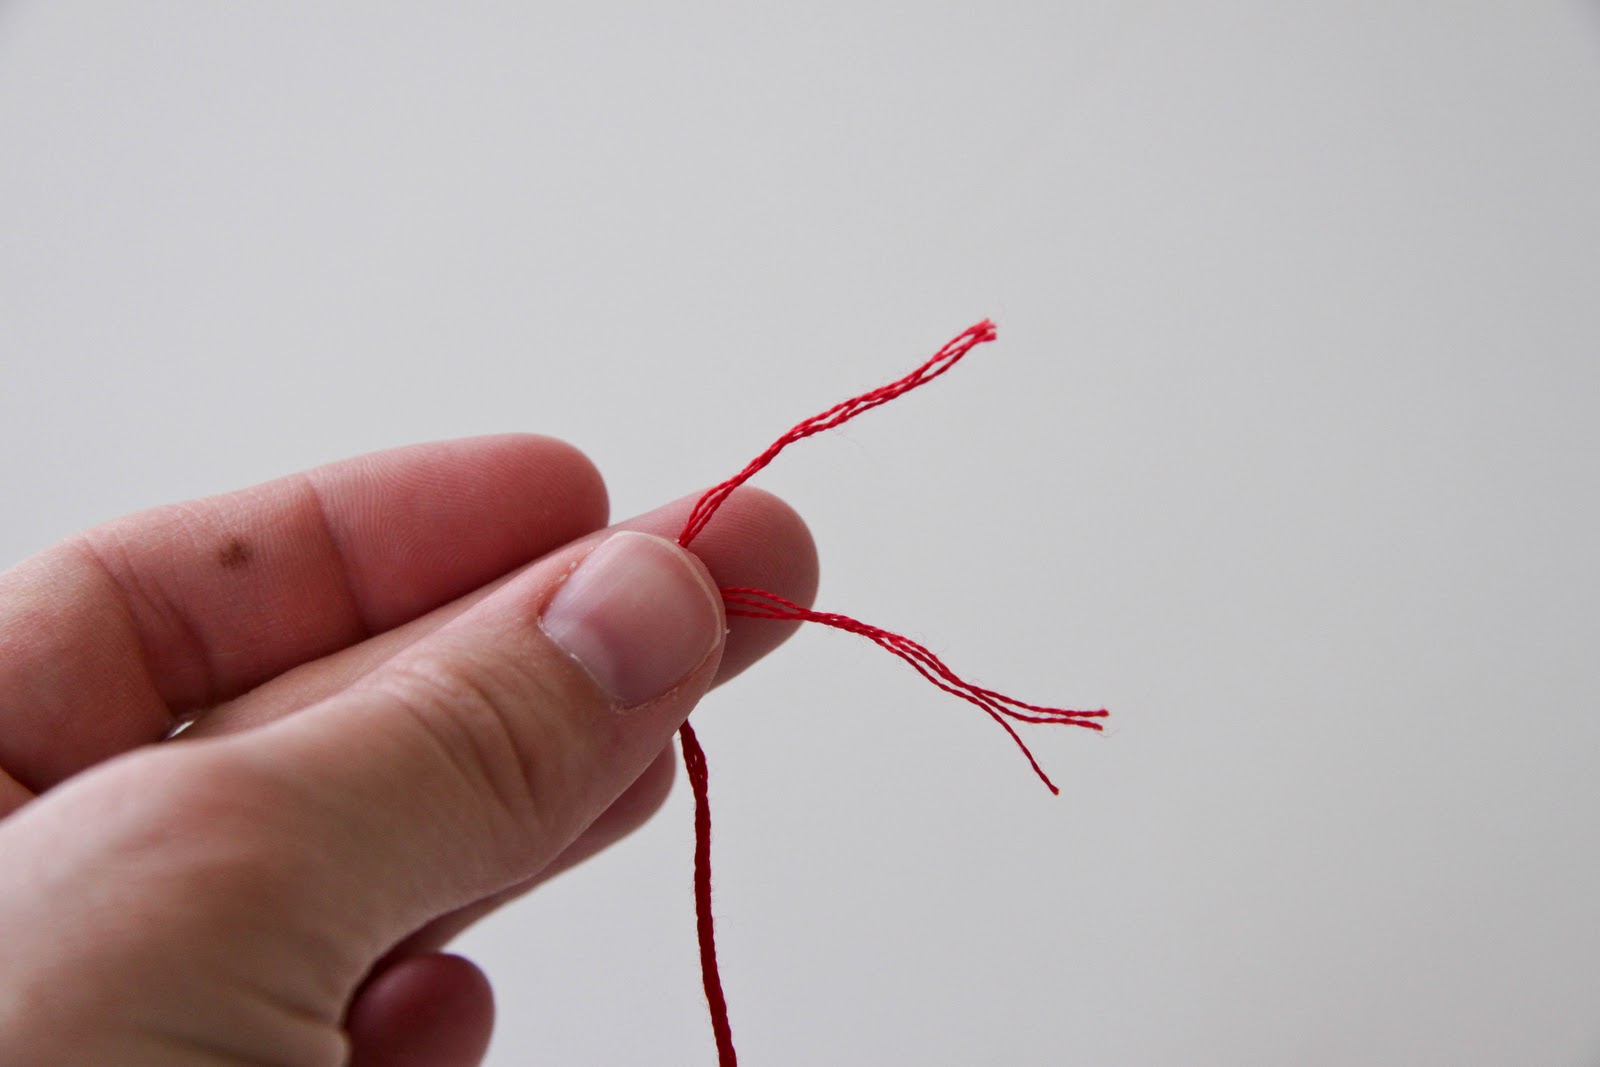
You will need to separate half of the floss. When you move the fibers you will see there are 6 strands in one floss.
You will only need 3 strands.
Take three strands and pull them apart. Reserve the other 3 strands for later use.
Step 4
Combine your 3 strands together so that it fits through the needle.
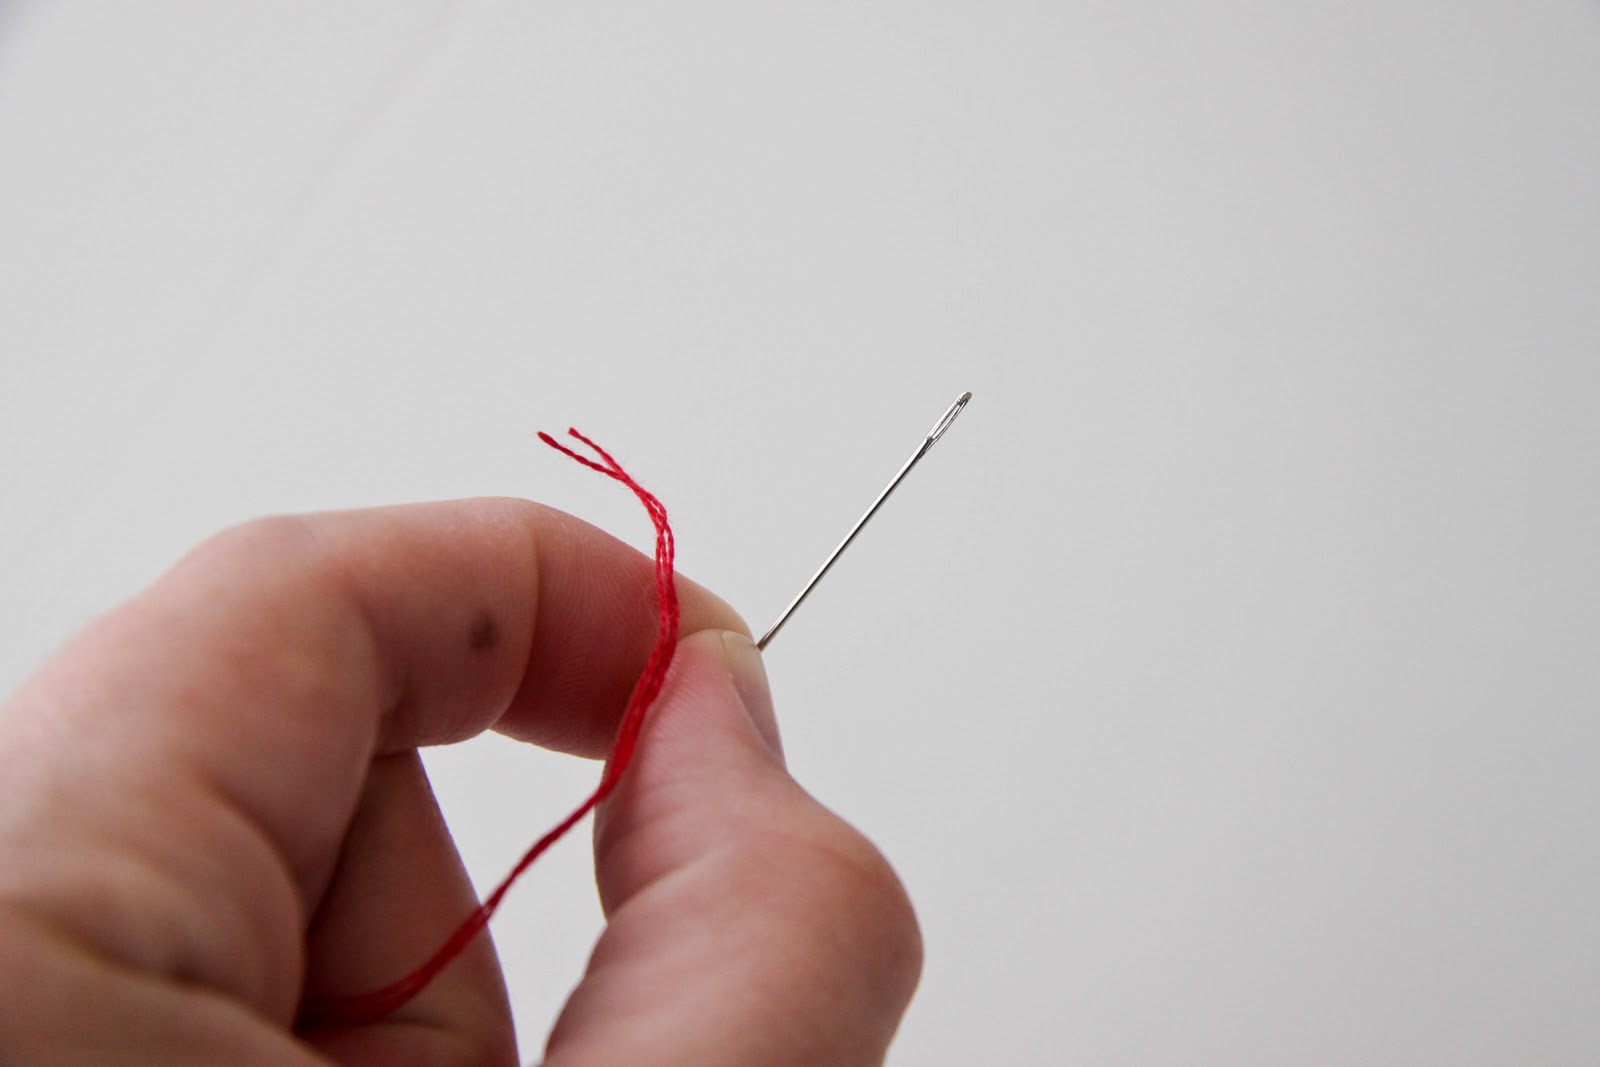
Step 5
Pull the strands half-way through the needle to join the end.
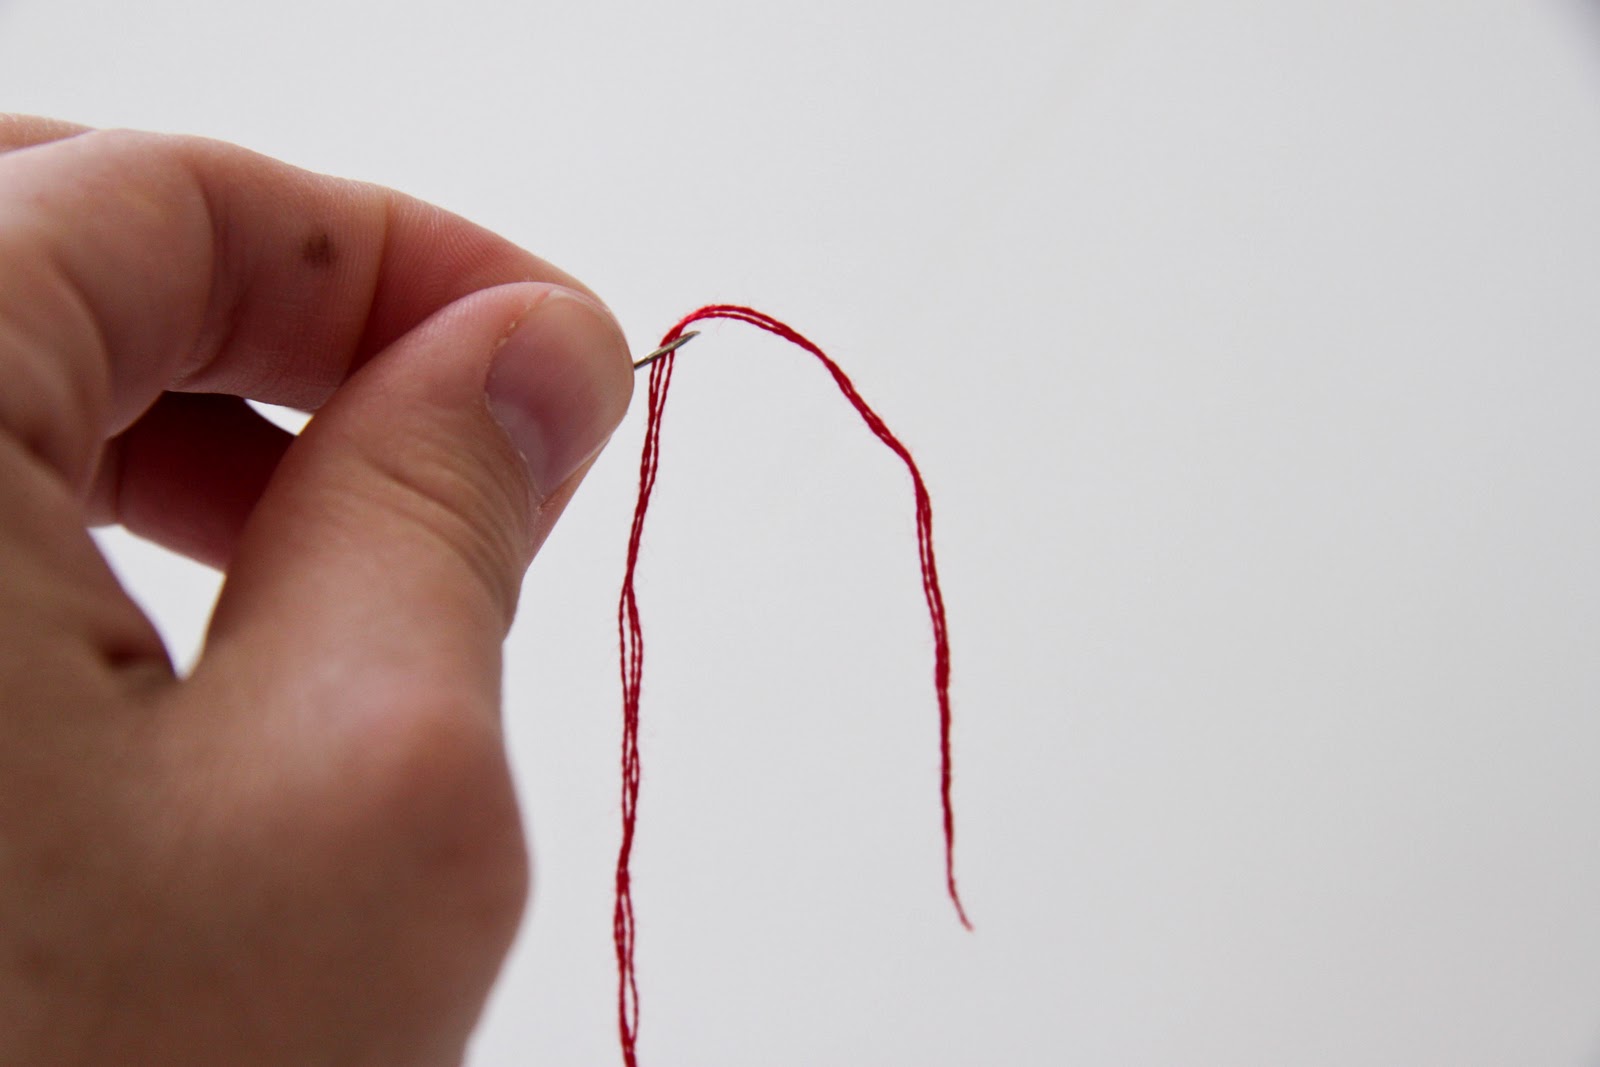
Step 6
Tie the two ends together. This will create a total of 6 strands once you have threaded correctly.
Step 7
Starting in the back of your fabric/pillow, push your needle up through the line and follow your letter. You will weave in and out, in and out until you run out of floss (embroidery thread).
Step 8
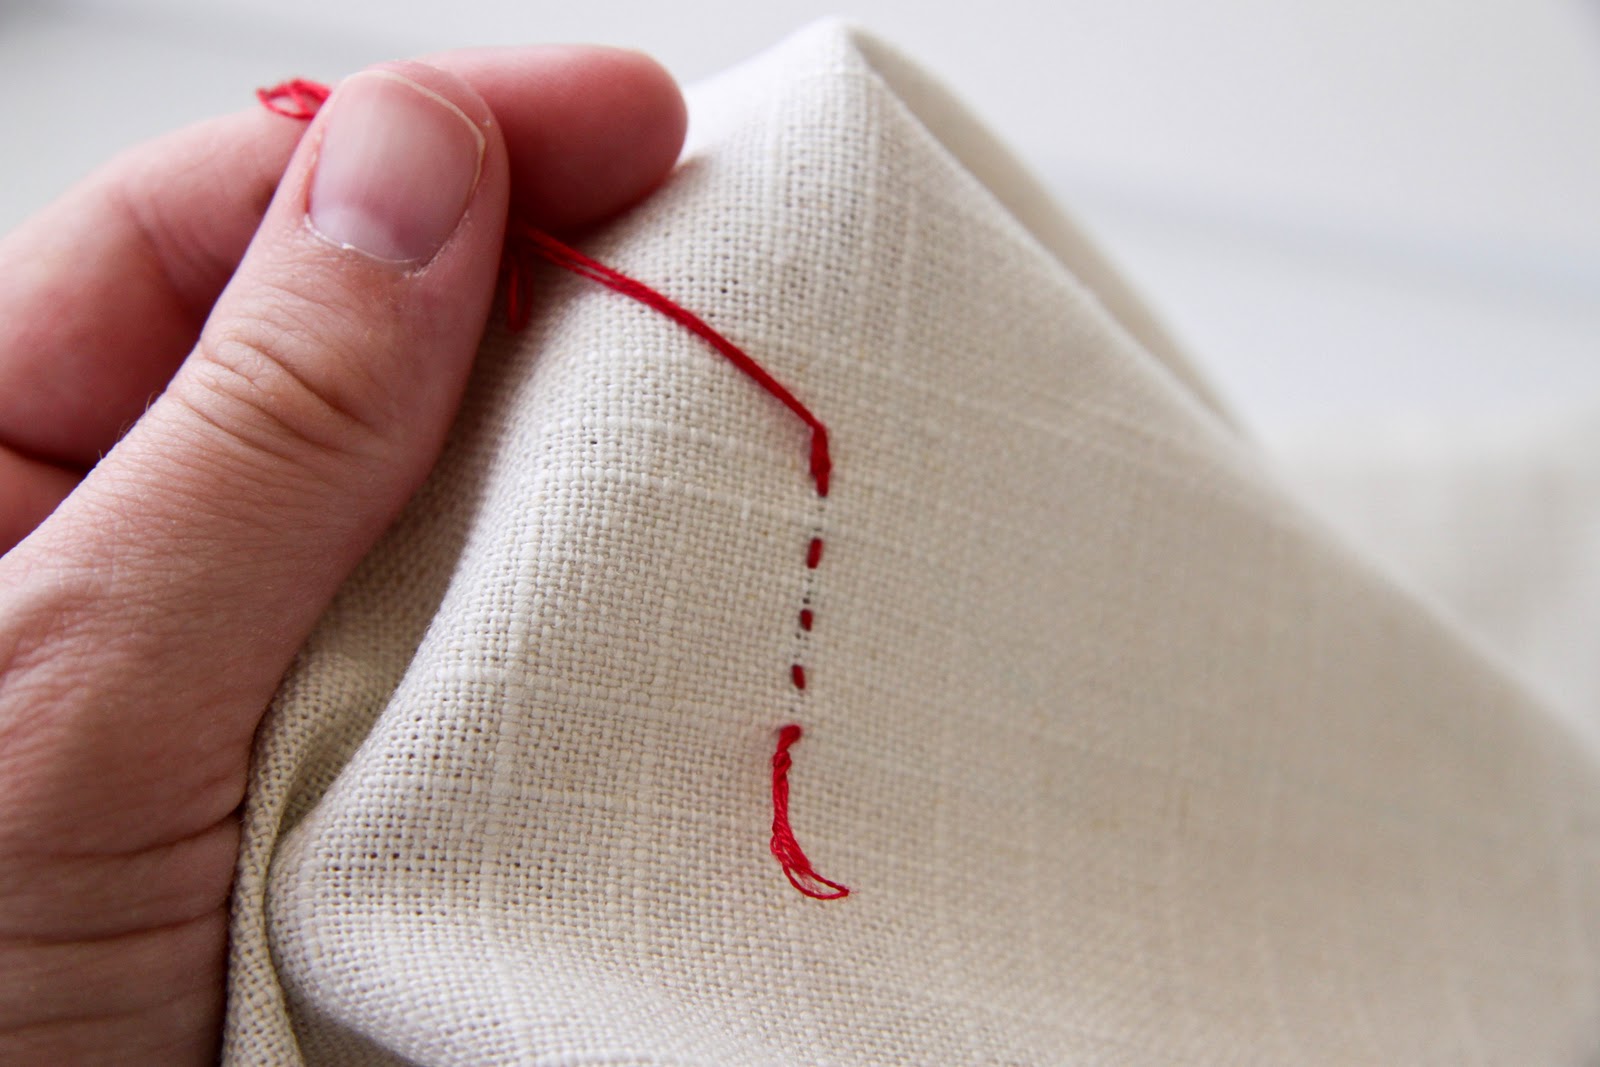
This is the back of the fabric. Once you have run out of floss you will tie it off in the back and re-thread your needle and continue.
Step 9
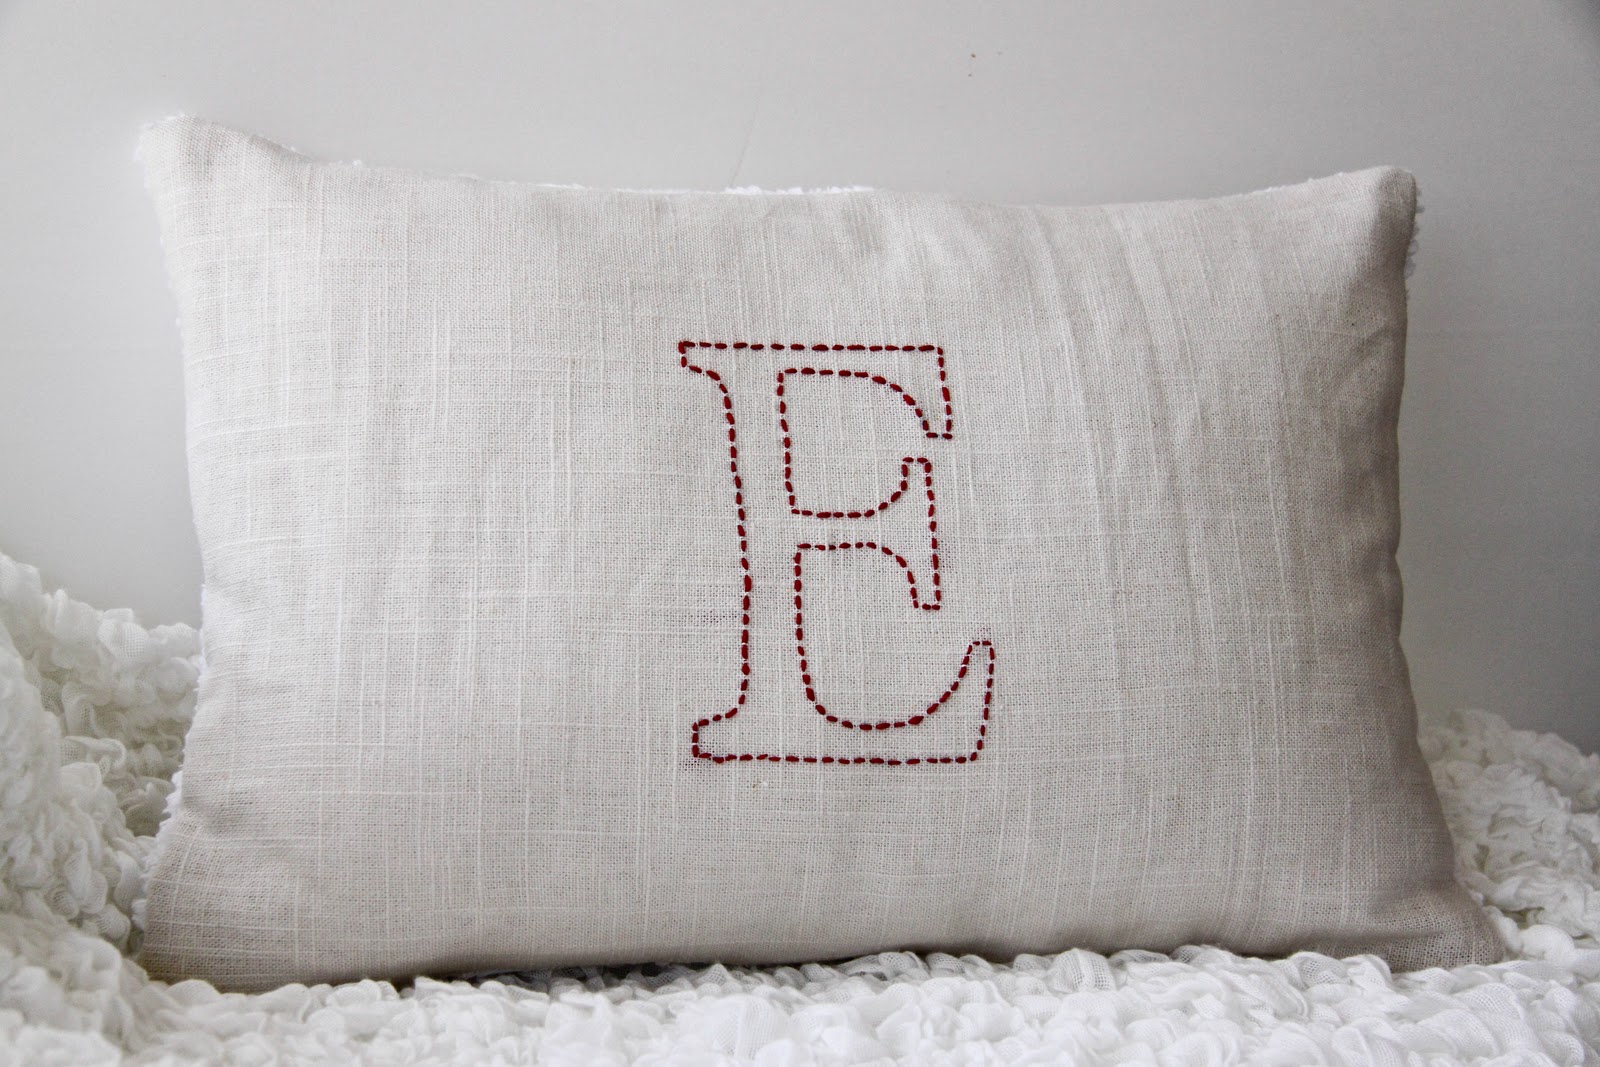
Once you have threaded your letter and no longer need the blue marker as a reference, take a wet towel and blot the blue marking. It should completely disappear.
Step 10
Sit back and admire your fabulous customized pillow!
Are you trying to make me crazy with guessing his name!?! I have my idea...
Reply DeleteThe pillow looks great!
I am obsessed with that pillow! I think I need to make one!
Reply Delete& I agree with mandi... now i am itching to know his name ;)
E..... ok, I have some pretty good guesses now!
Reply Deletehey!!! oh yes! a tutorial. i was hoping for one of these on this very pillow. i love the pics. and you are a teacher at heart. very informative!
Reply Deletewhy am i the only one who knows his name??? i feel really honored about that. unless you've changed it. now i know to keep my lips sealed.
That's a beautiful pillow! I'll have to find a pen like that, I've been using pencil or writing on the inside of the fabric, but the pen looks easier. I love to embroider, but poor Ewan still doesn't have anything I've made! This looks like a fast enough idea that I could actually get it done.
Reply DeleteBeautiful, it turned out perfect !!
Reply DeleteAina
Ms. Robyn Elliott Farmer....The E on the pillow was the safe letter....I can't wait to see what goes with it :) Love you guys!
Reply Deletei love the simplicity of that pillow!!
Reply Deletelove it!
So very cute! I want to try this!
Reply DeleteVery clever. I just may copy this idea.
Reply DeleteThis is neat looking...thanks so much for the idea!!! Hop over and share it at my NTT party...hope to see ya there:)
Reply DeleteBlessings,
Linda
I love pillow tutorials!! :D
Reply Delete