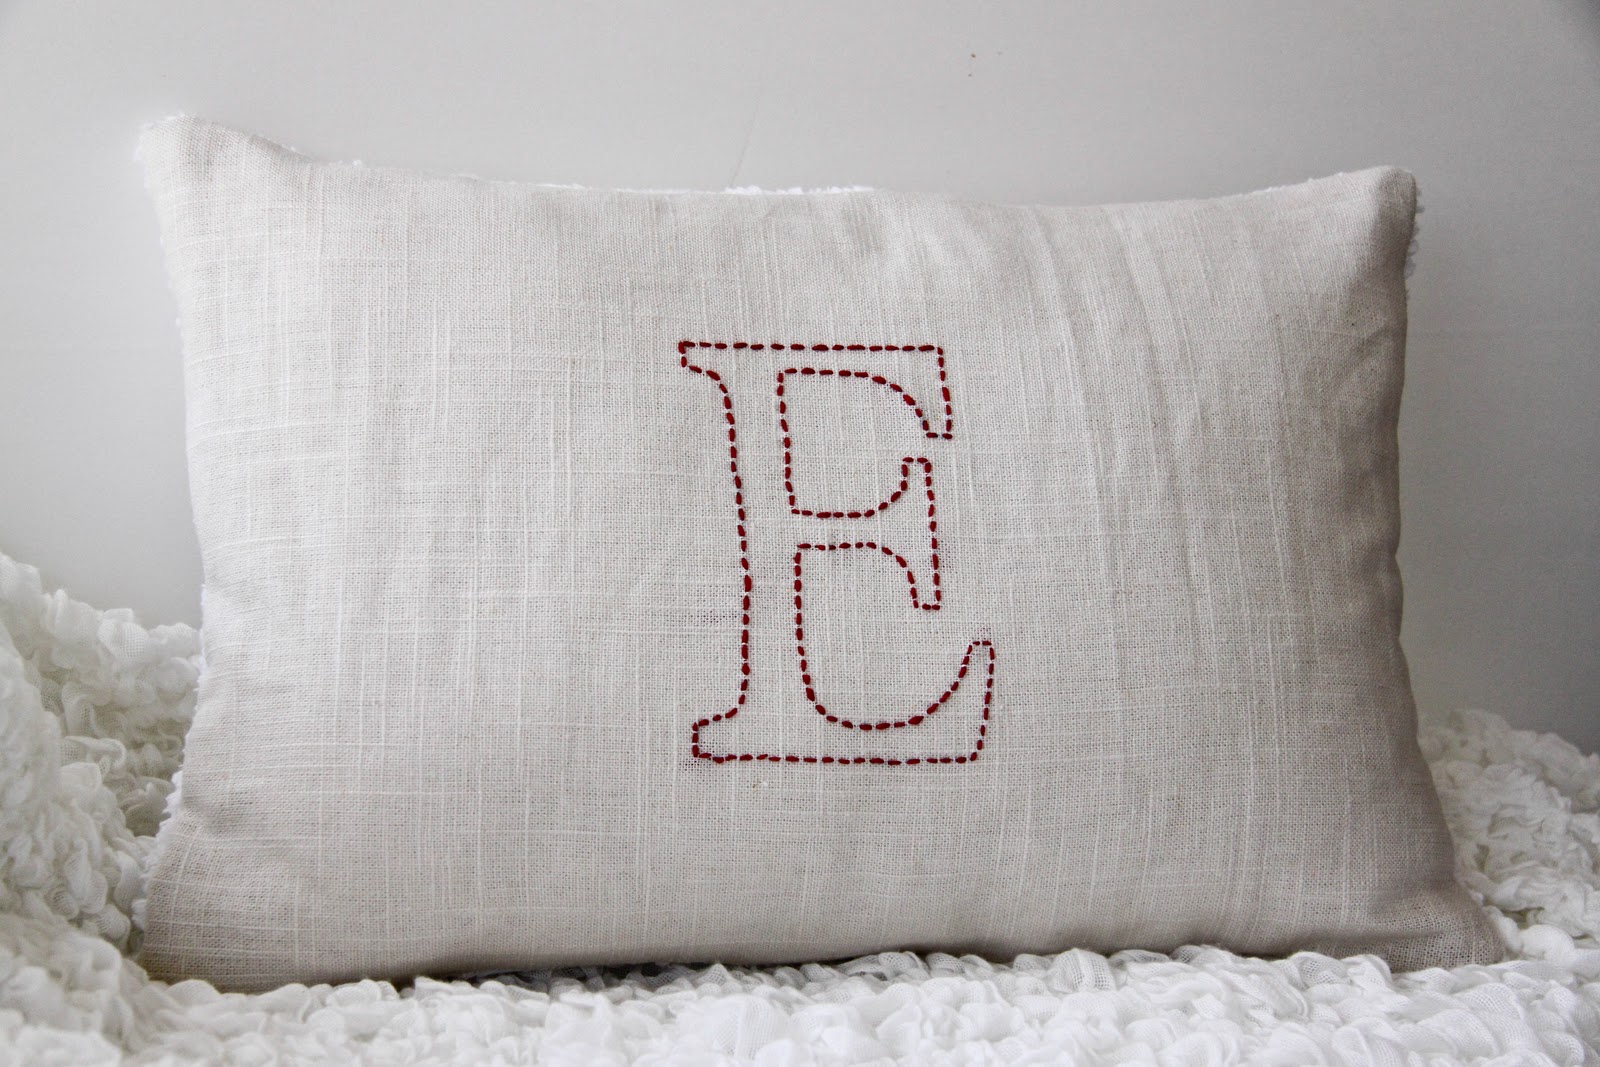
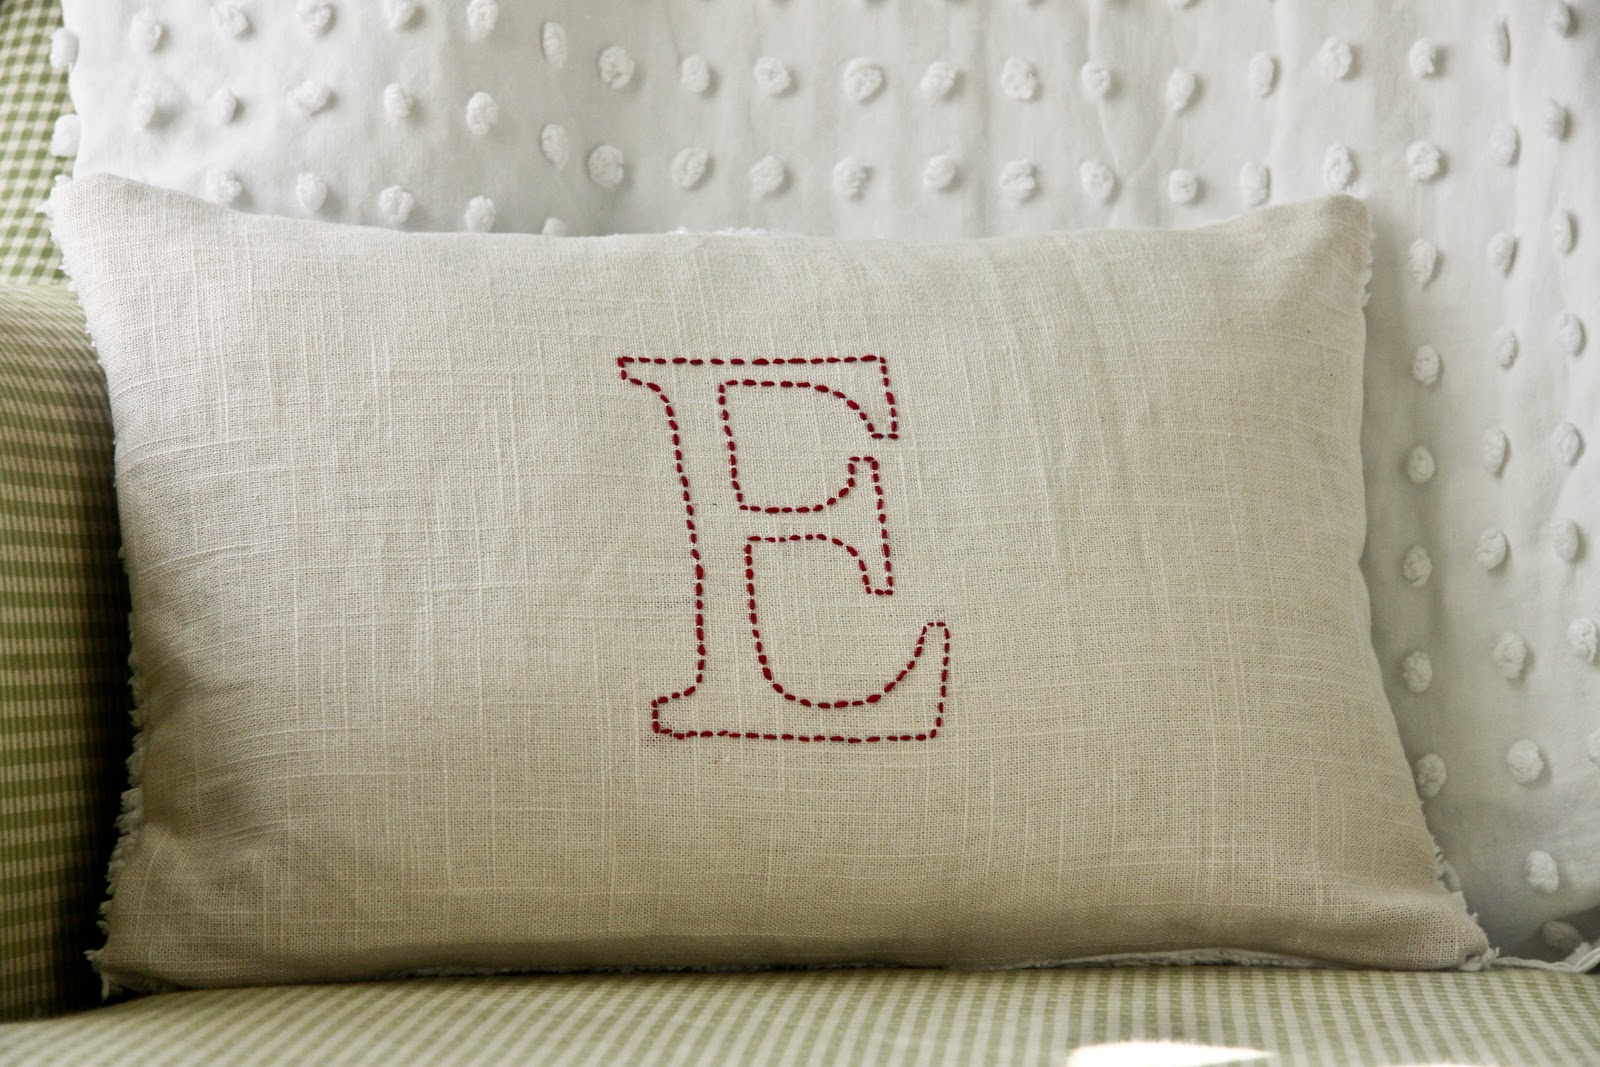
I have already met my budget for the nursery so I knew I was going to have to get creative.....insert homemade monogramming/embroidery.
When I first started this I was just hoping it would turn out looking decent, once it was finished and in the room I loved the way it looked sitting on my glider...so much so that I want to make some for our bedroom.
This is a super easy project with no sewing skills required. Sometimes I think people see a needle and yarn and think they can't do it. I promise, if you can follow a straight line and stick a needle in and out then you've got this.
Supplies:
Cotton Embroidery Floss
Erasable sewing pen
Letter template ( I used one previously cut from a cricut but you could easily print and cut on regular paper.)
Pillow or fabric you plan to use to make a pillow.
Medium size sewing needle
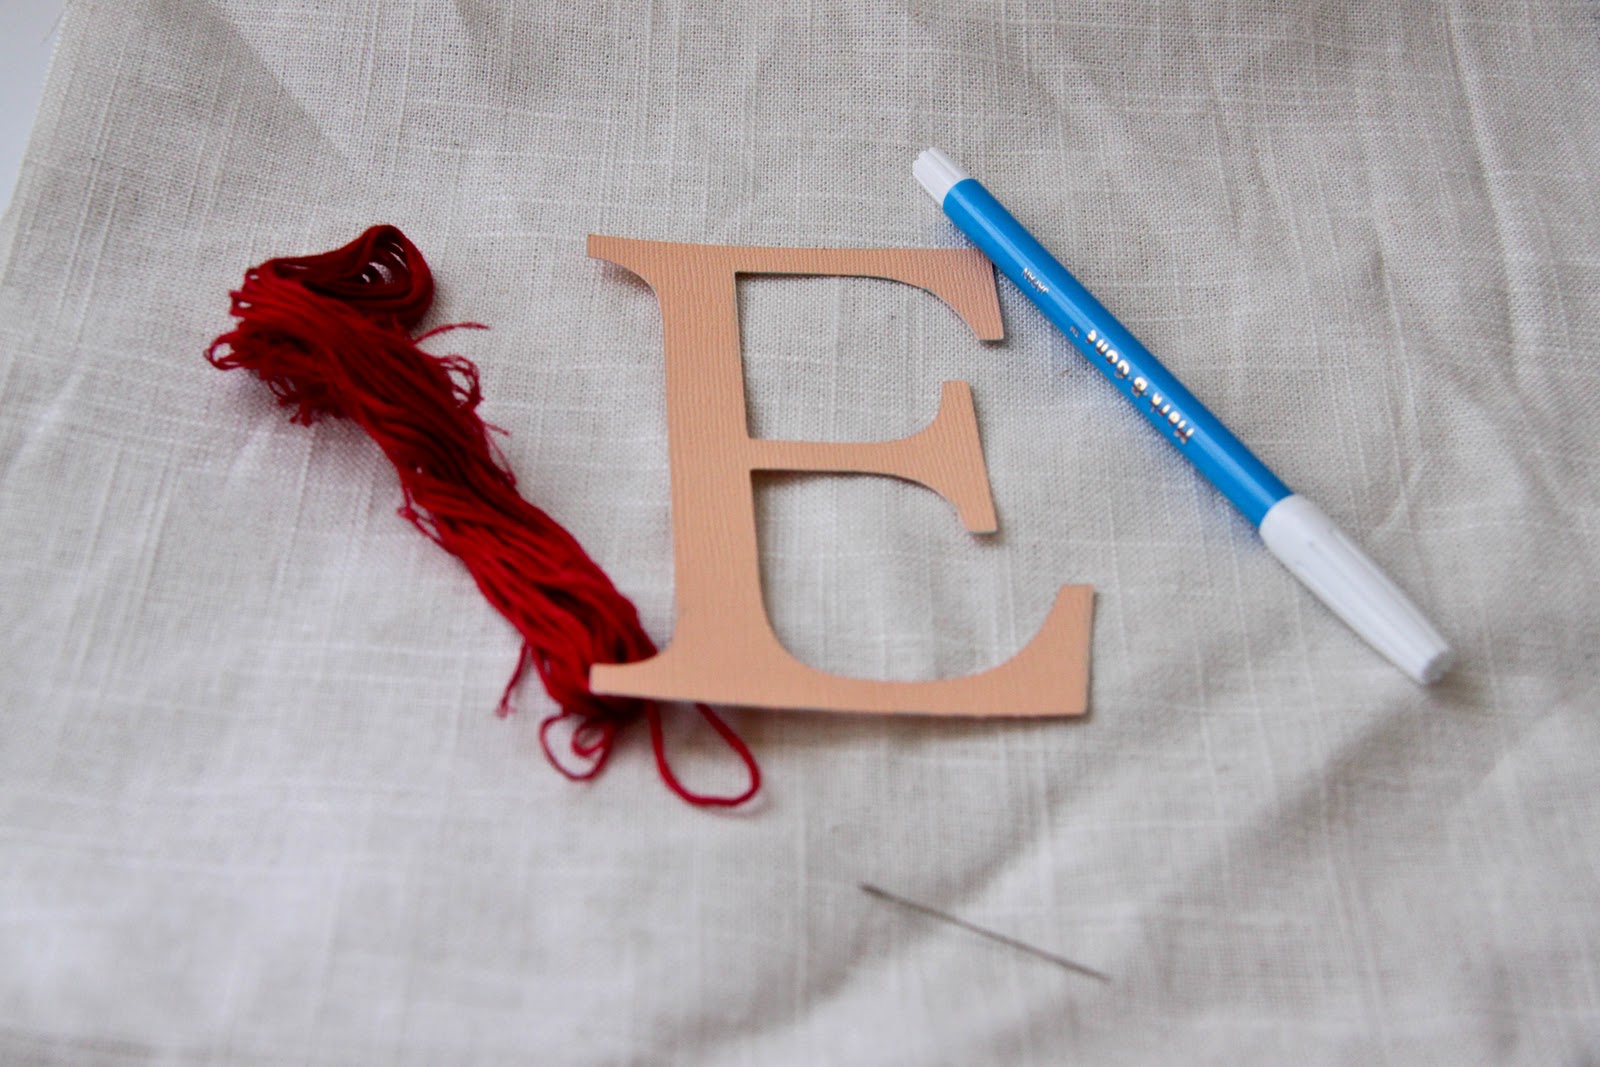
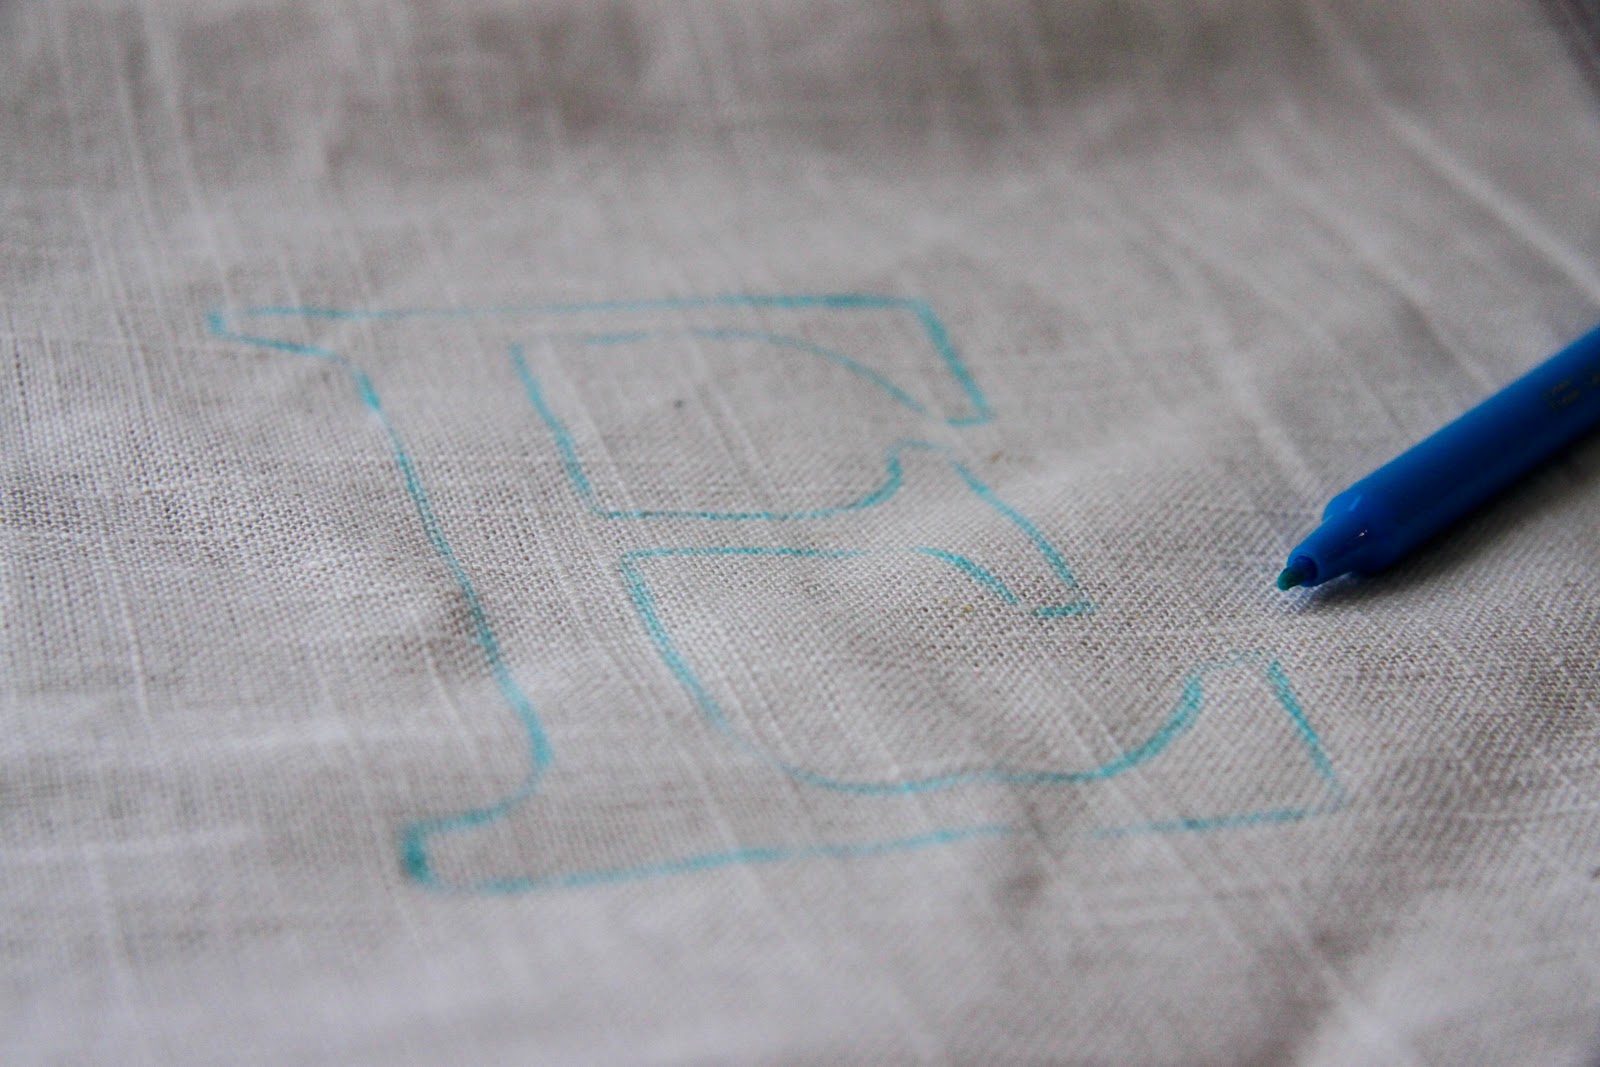
Step 1
Center the letter on your pillow and trace it with the erasable pen.
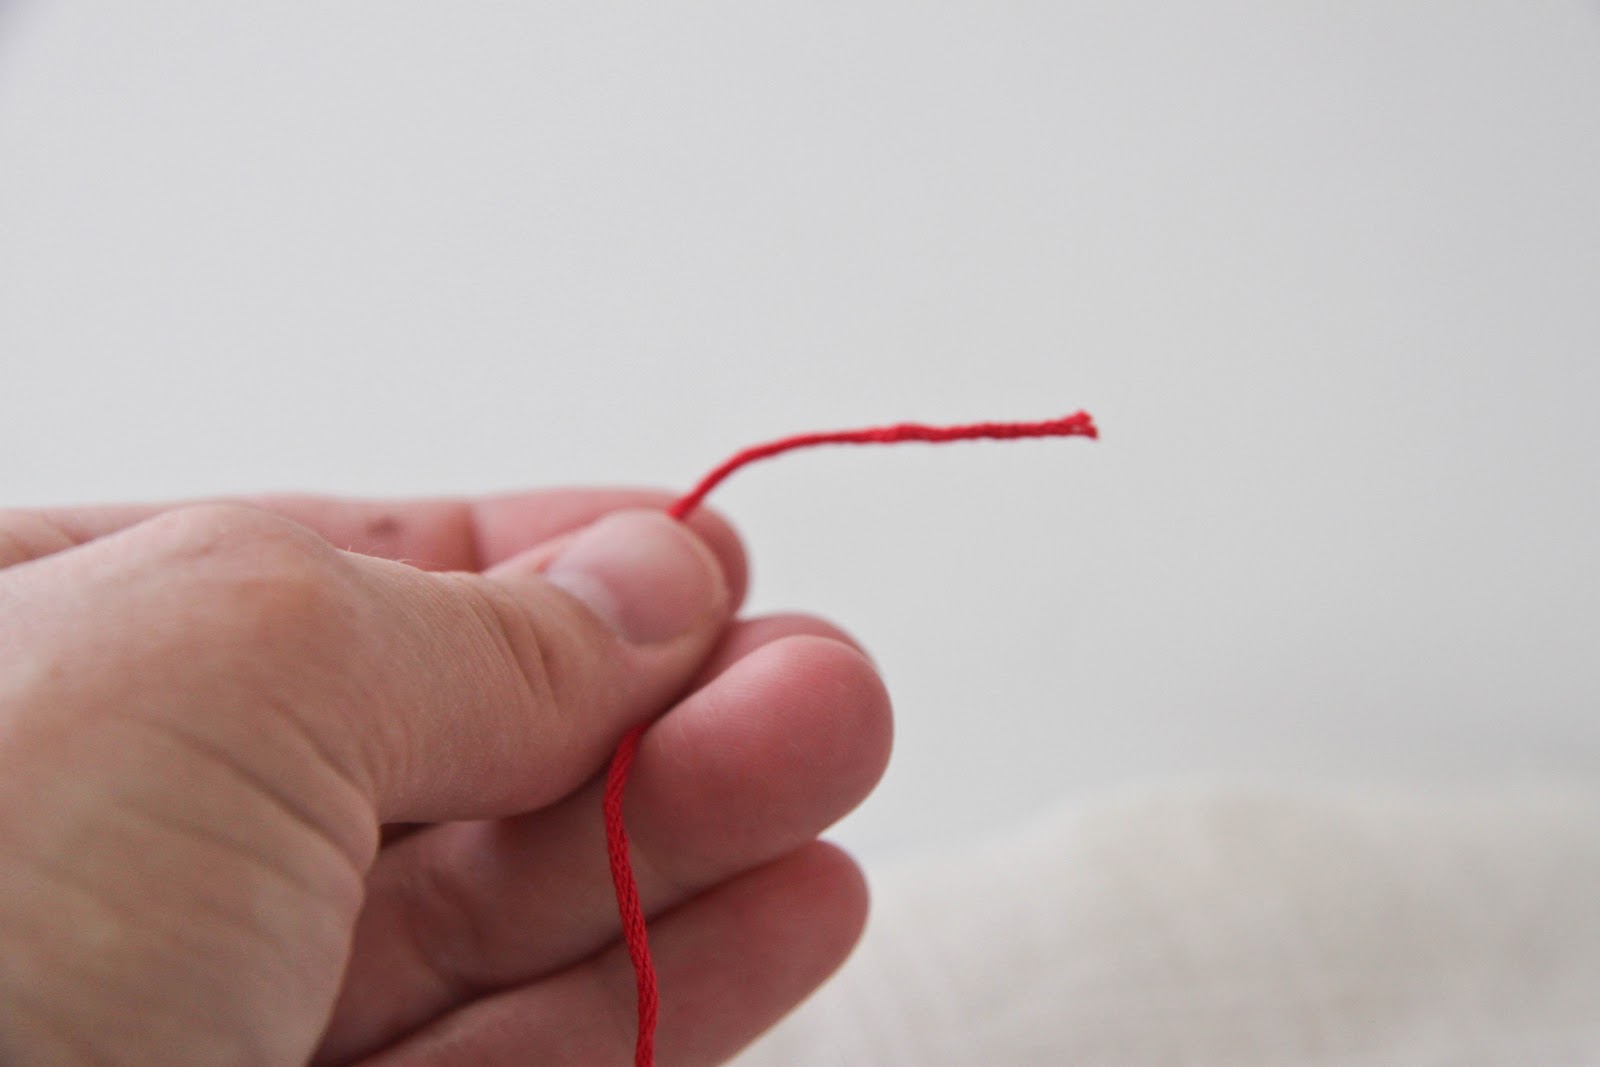
Step 2
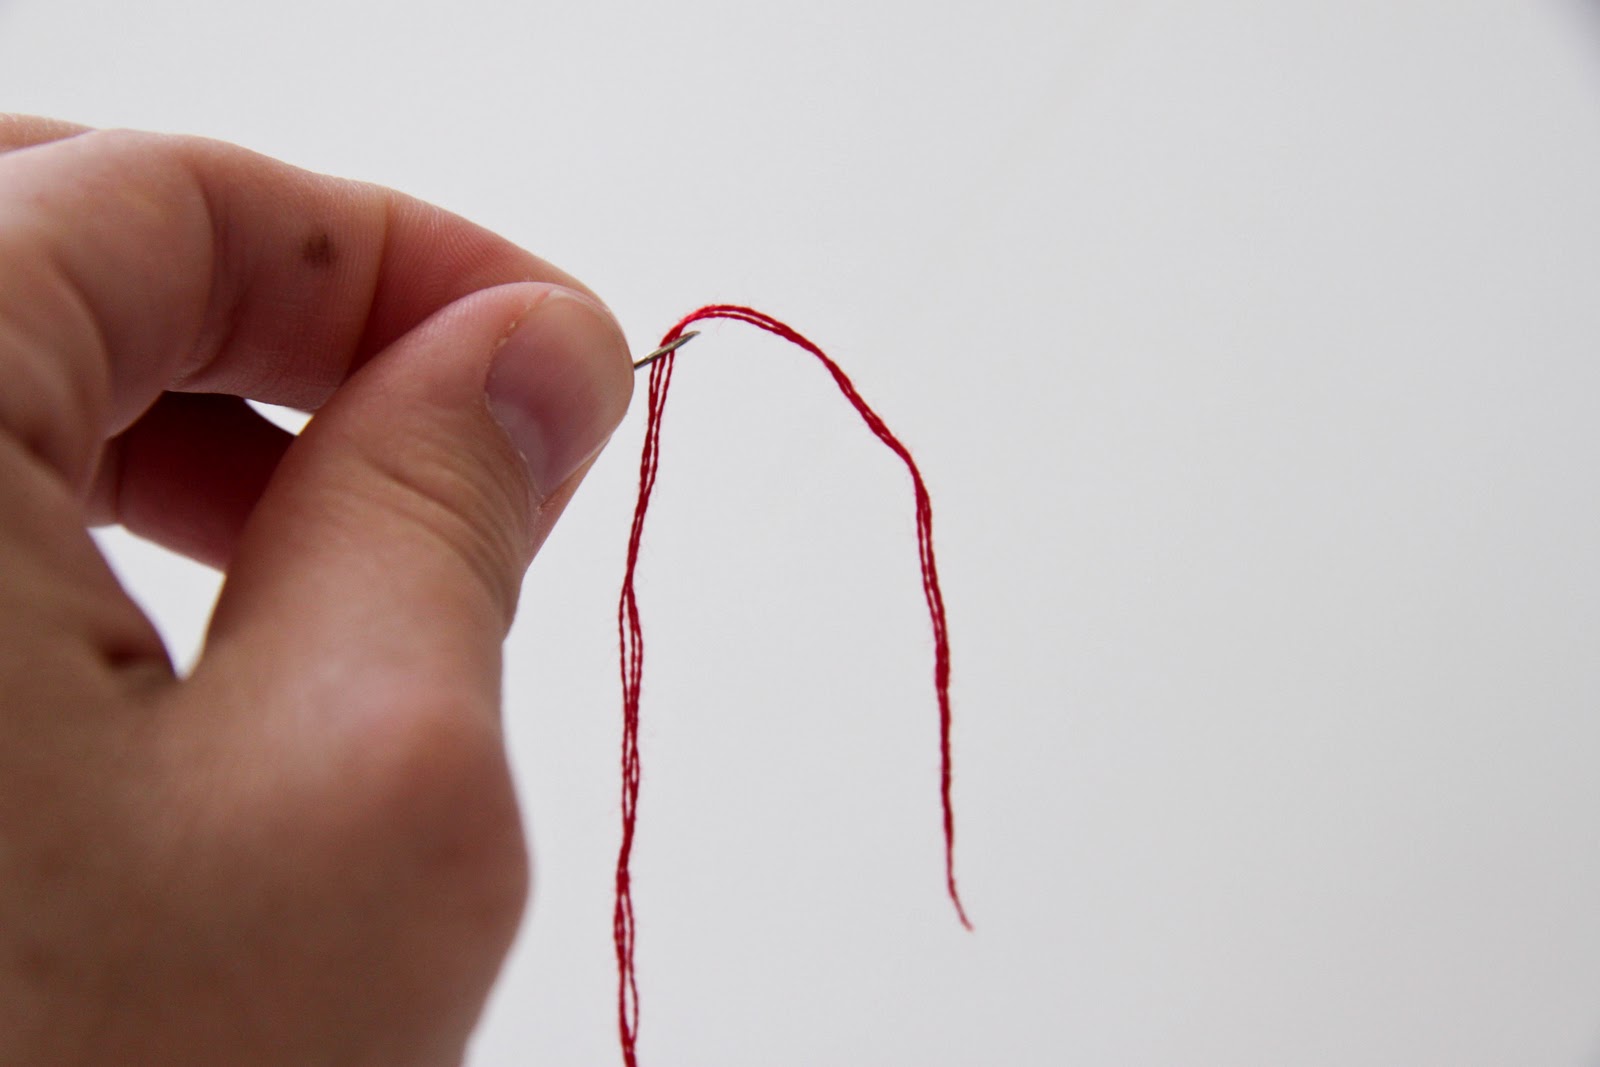
Cut a piece of the floss about 1 ft to start off with. Because you will loop this through the needle it will end being about 6 inches. You don't want your floss to be too long.
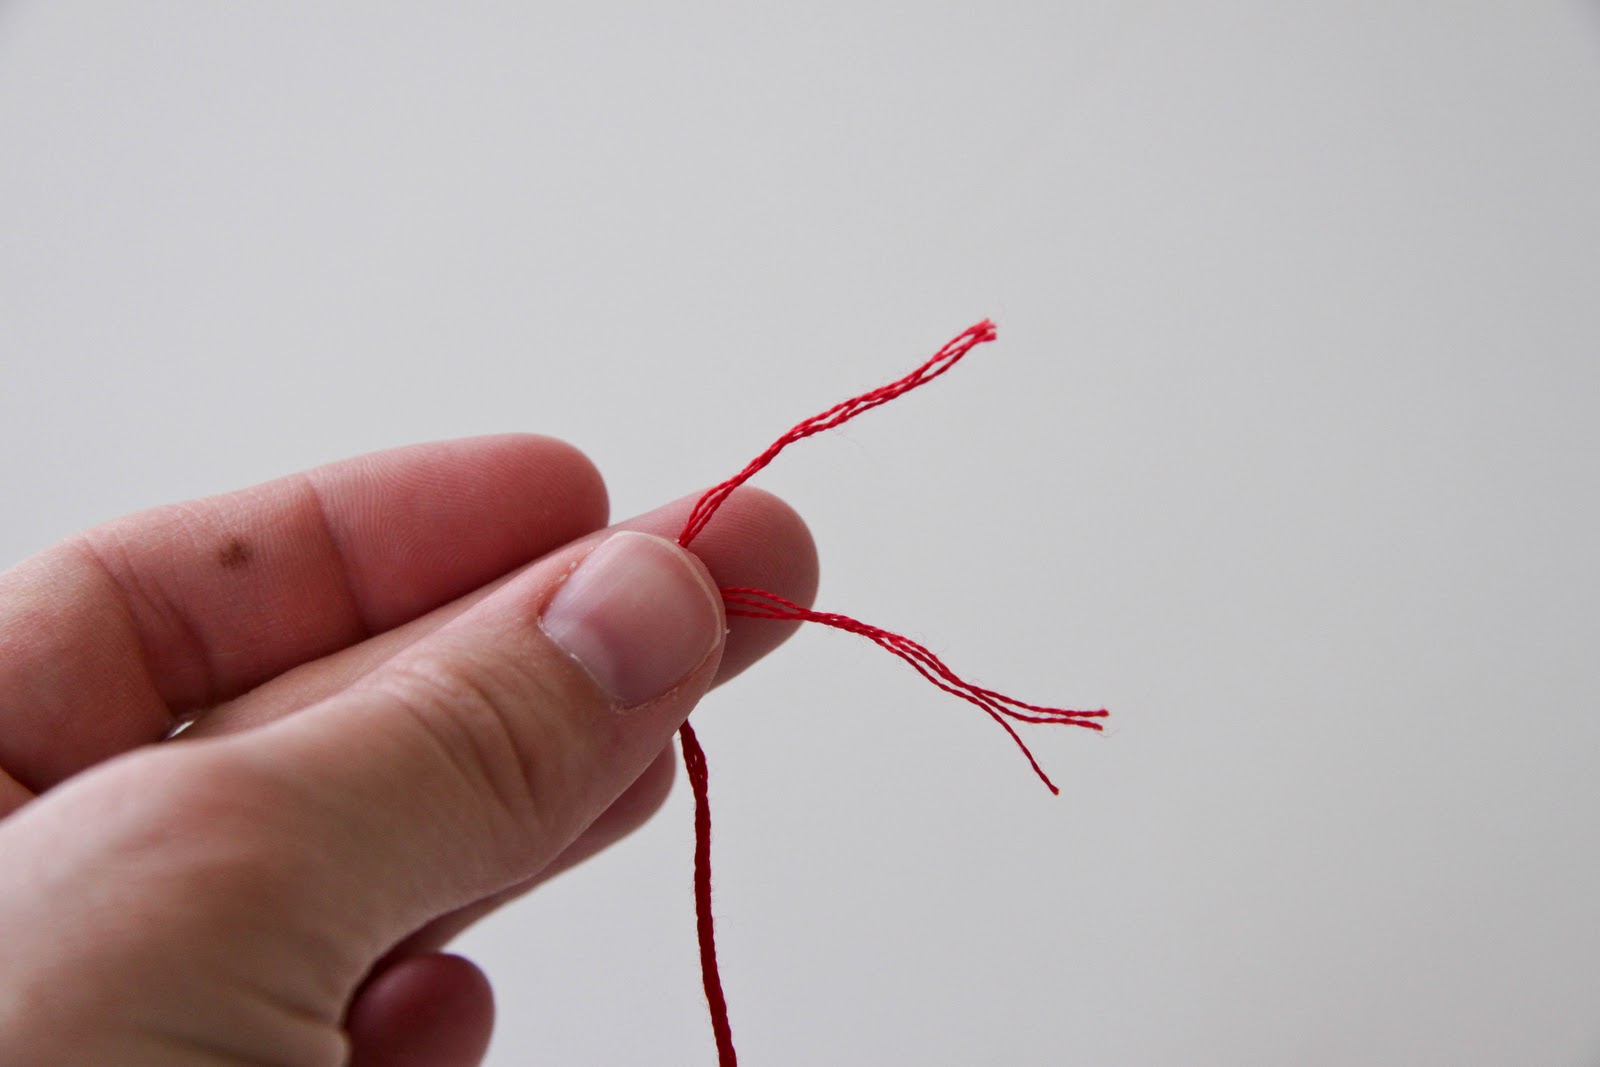
Step 3
You will need to separate half of the floss. When you move the fibers you will see there are 6 strands in one floss.
You will only need 3 strands.
Take three strands and pull them apart. Reserve the other 3 strands for later use.
Step 4
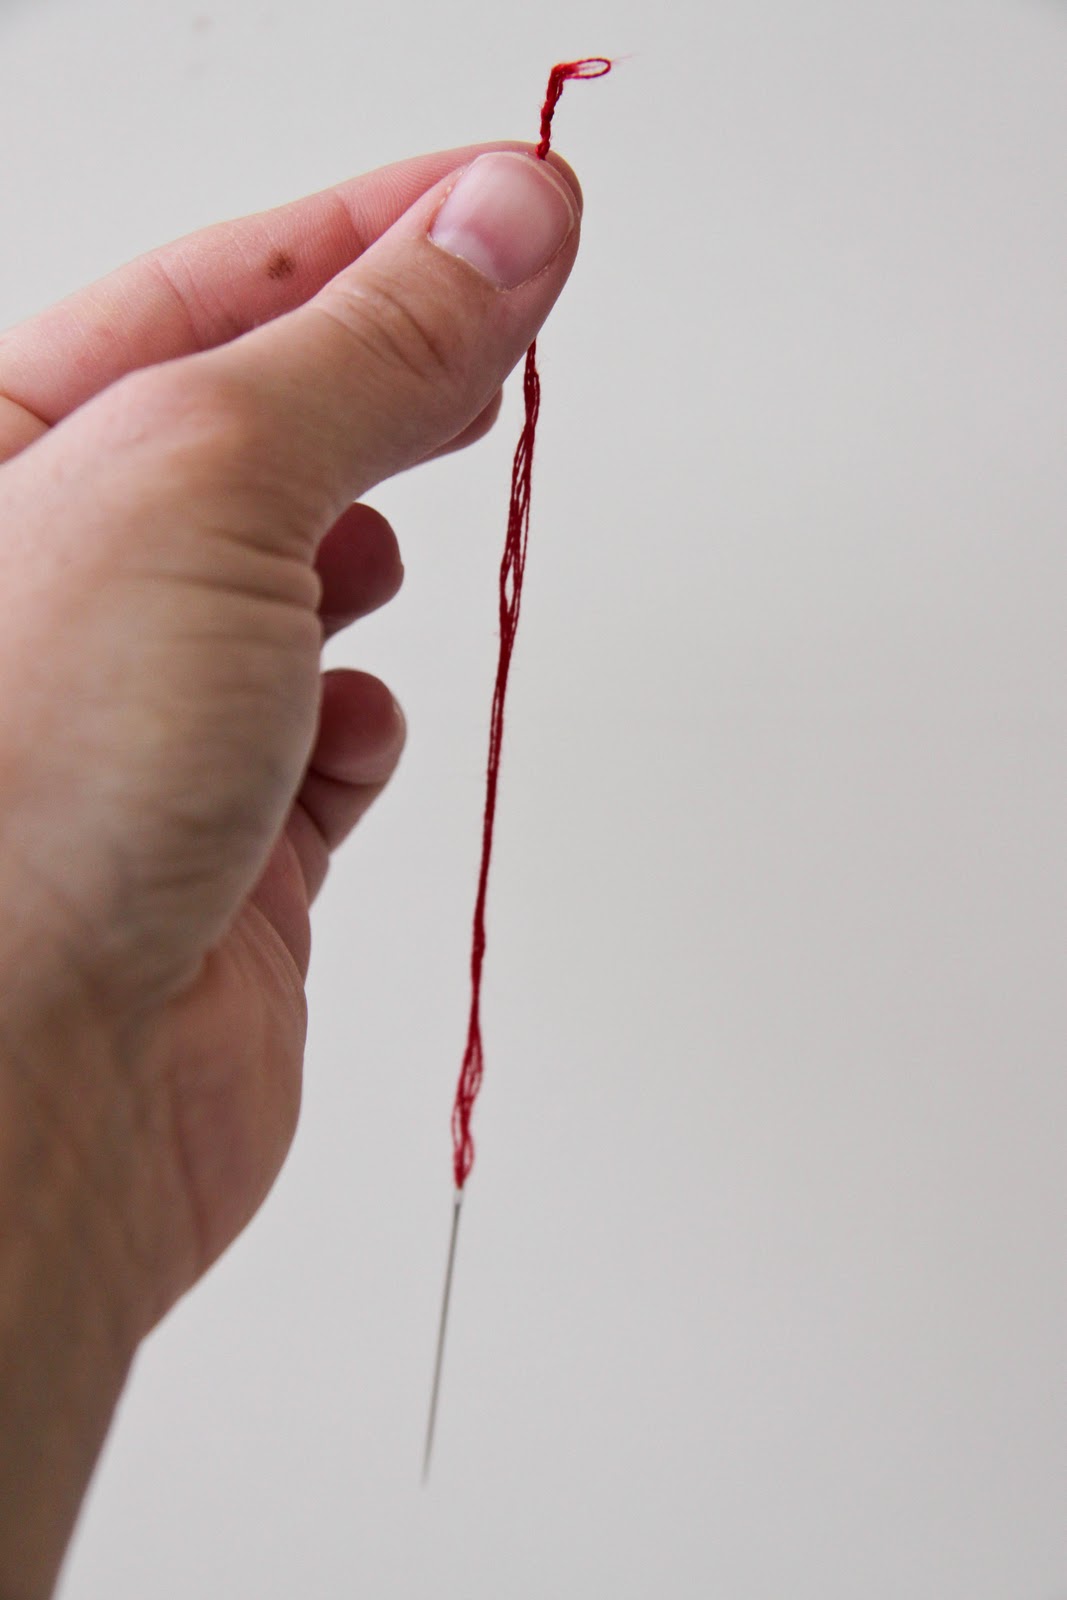
Combine your 3 strands together so that it fits through the needle.
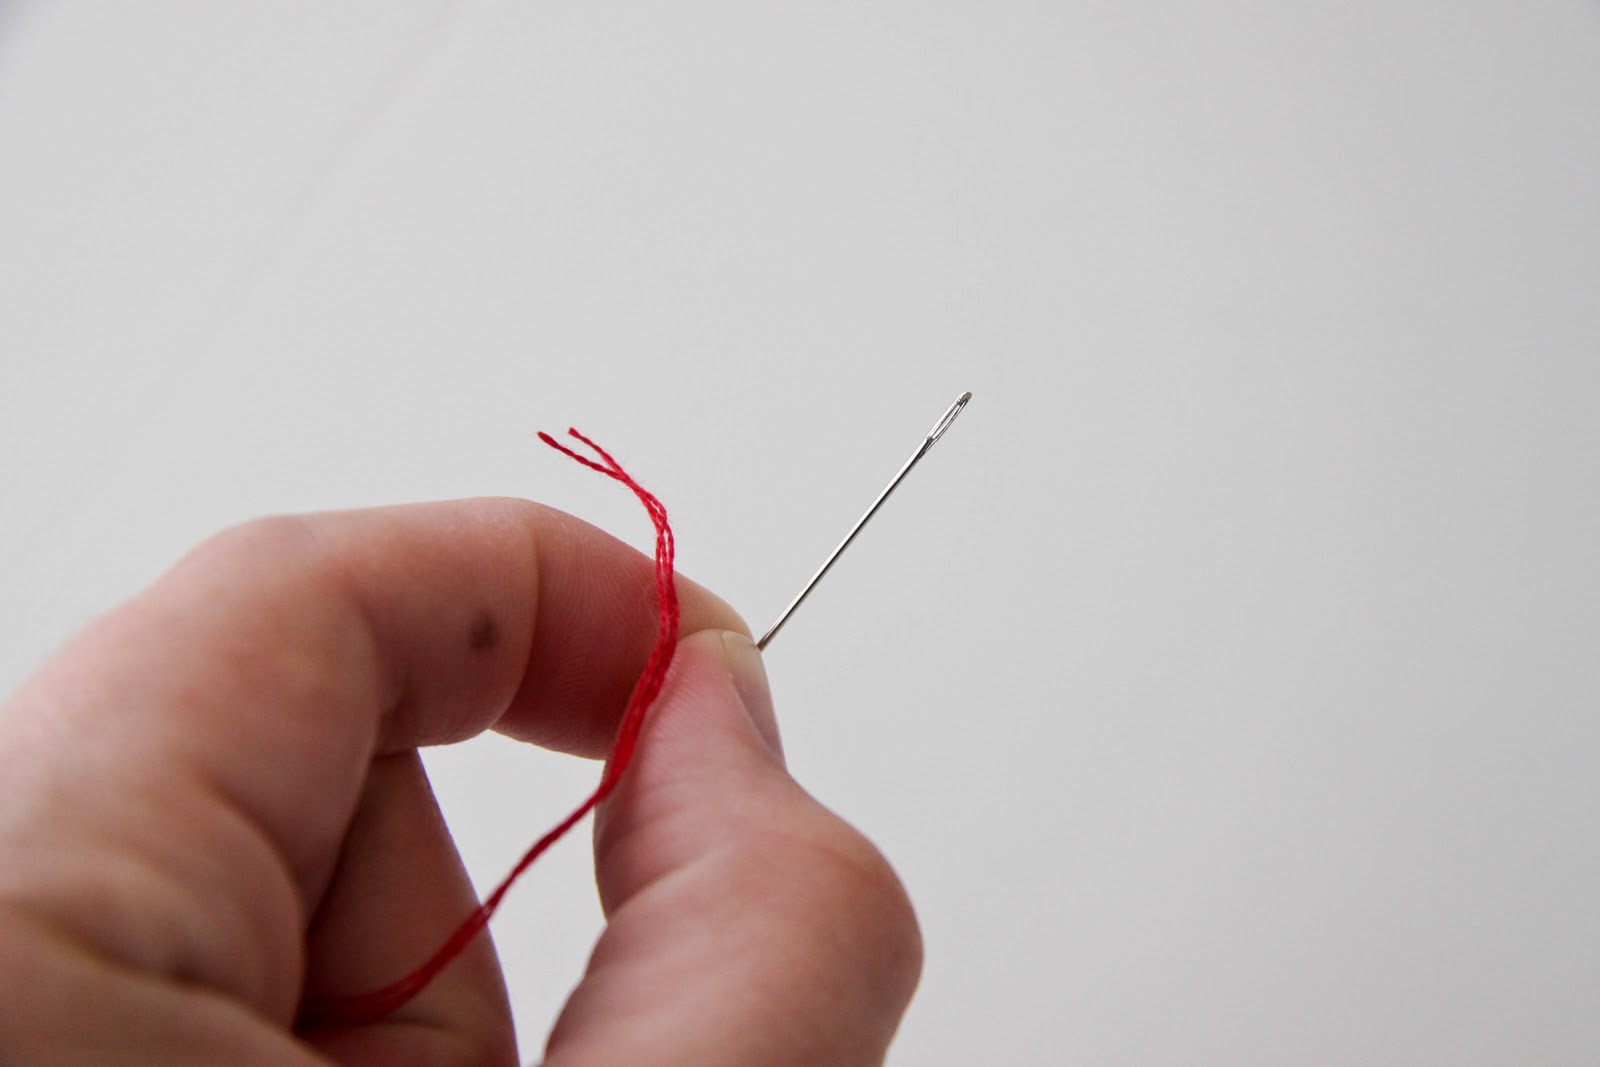
Step 5
Pull the strands half-way through the needle to join the end.
Step 6
Tie the two ends together. This will create a total of 6 strands once you have threaded correctly.
Step 7
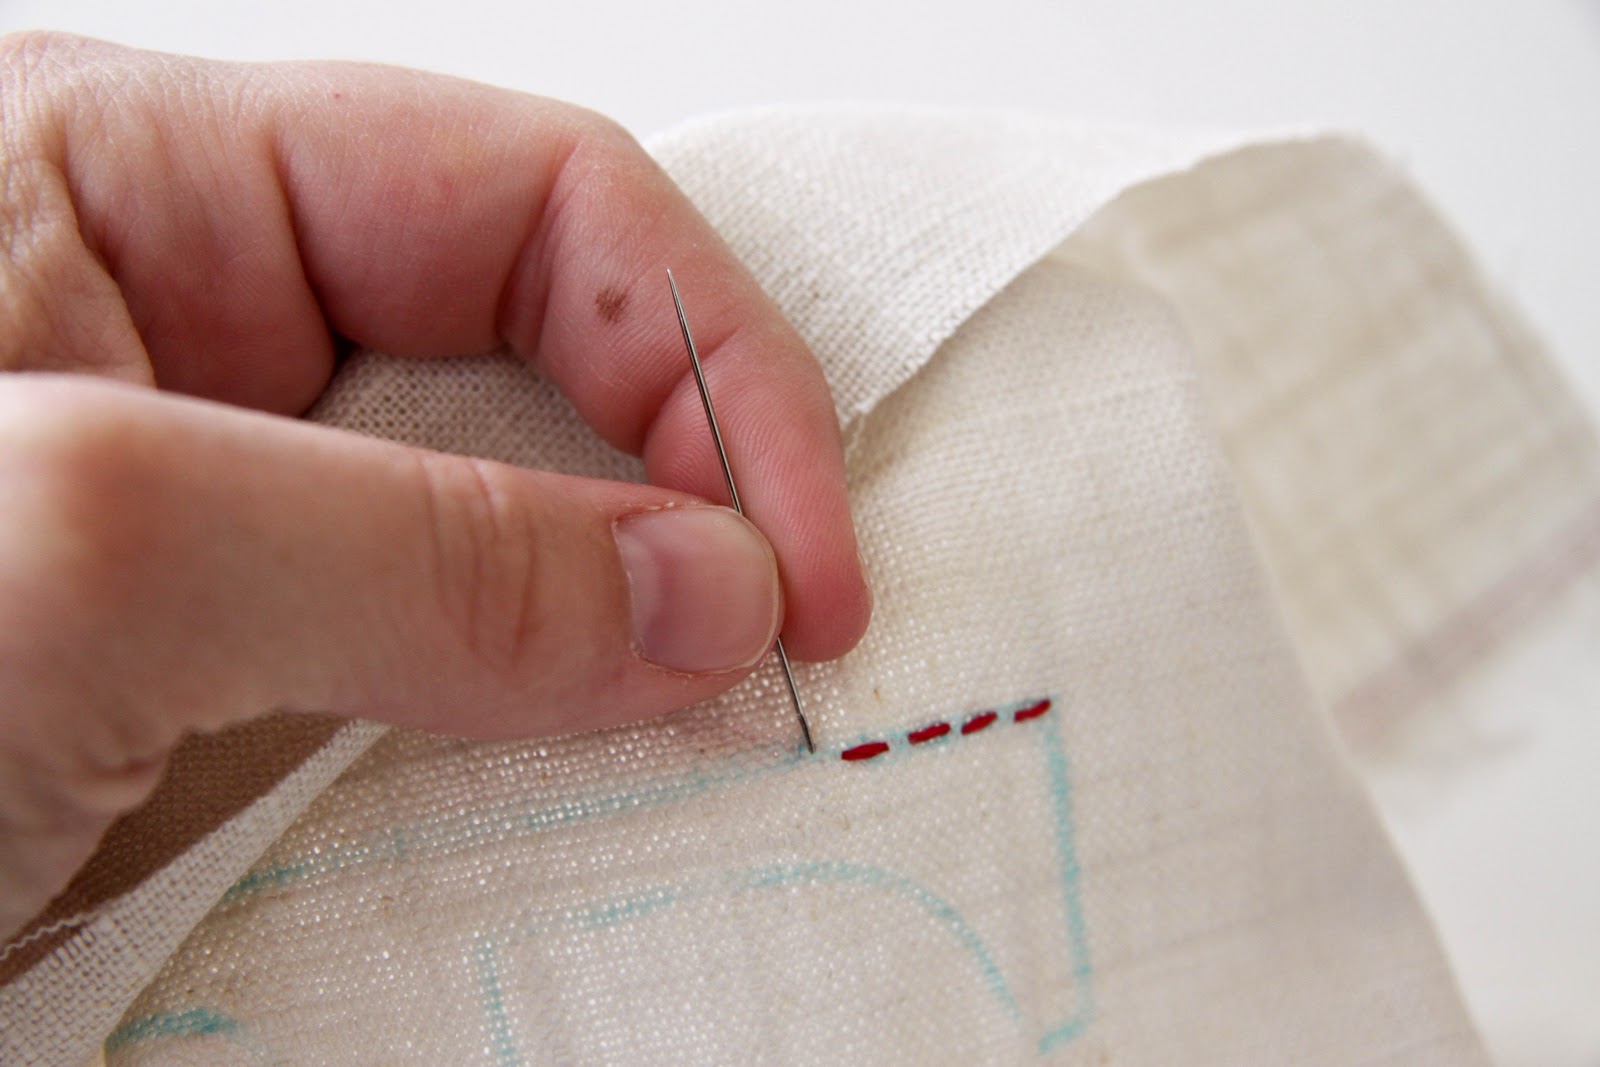
Starting in the back of your fabric/pillow, push your needle up through the line and follow your letter. You will weave in and out, in and out until you run out of floss (embroidery thread).
Step 8
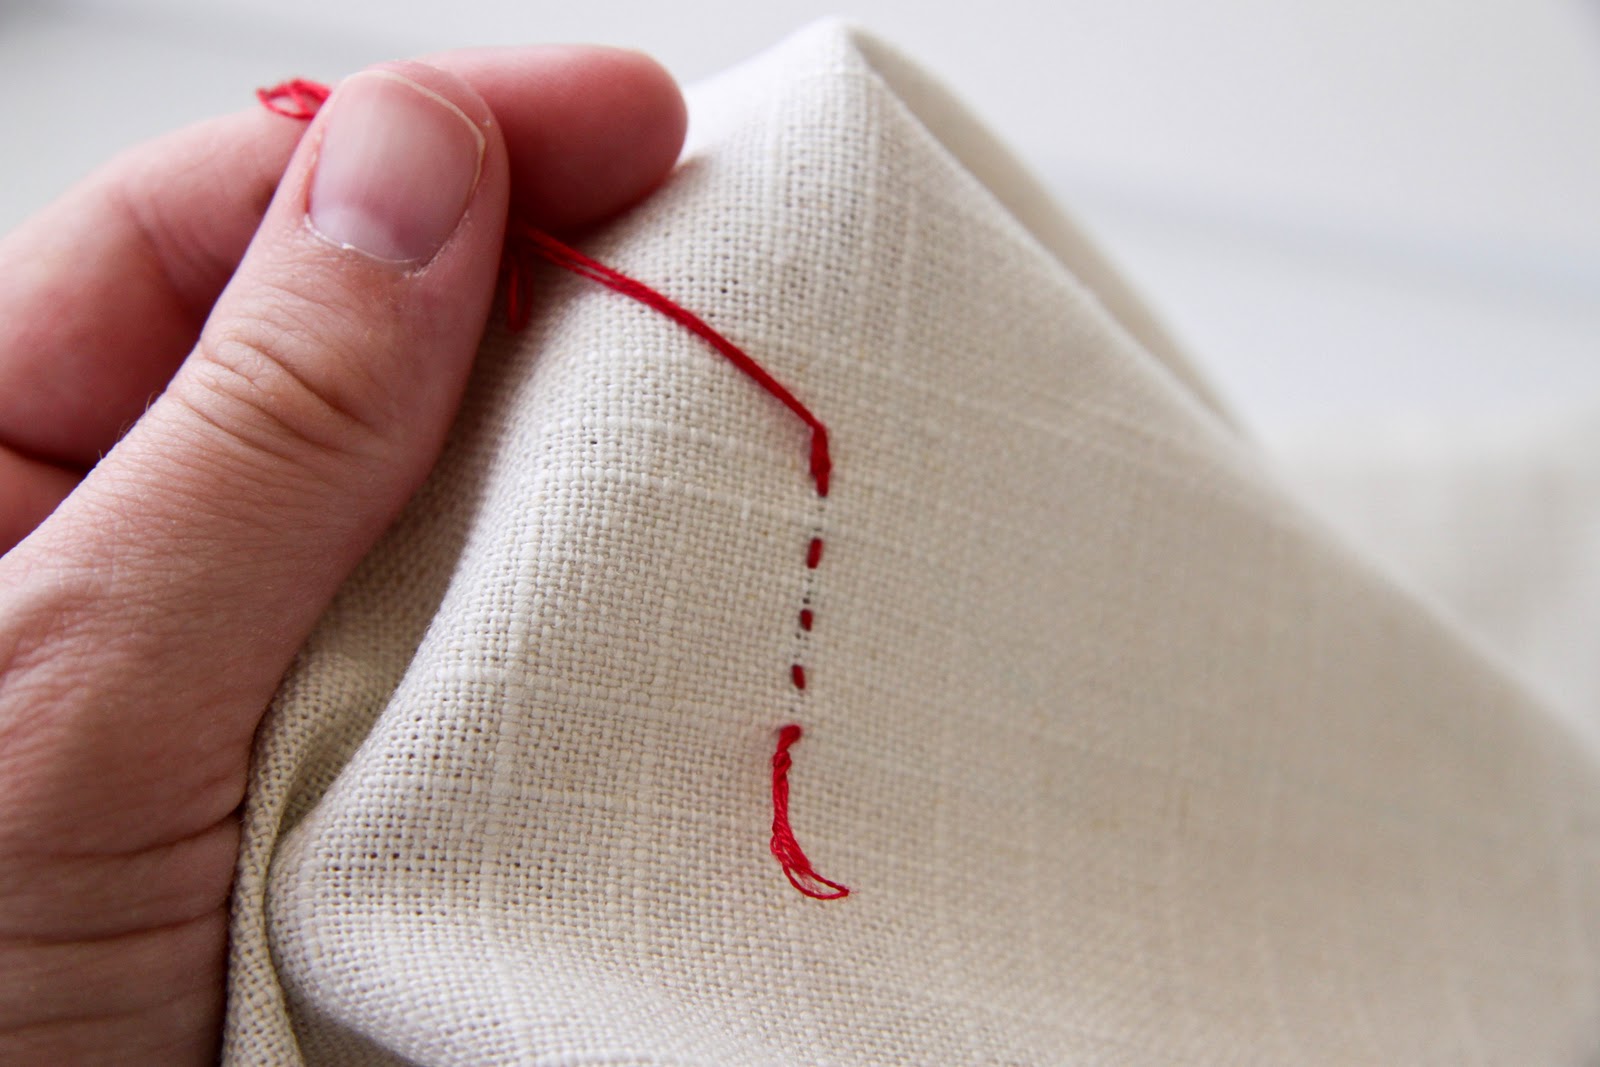
This is the back of the fabric. Once you have run out of floss you will tie it off in the back and re-thread your needle and continue.
Step 9
Once you have threaded your letter and no longer need the blue marker as a reference, take a wet towel and blot the blue marking. It should completely disappear.
Step 10
Sit back and admire your fabulous customized pillow!